Users
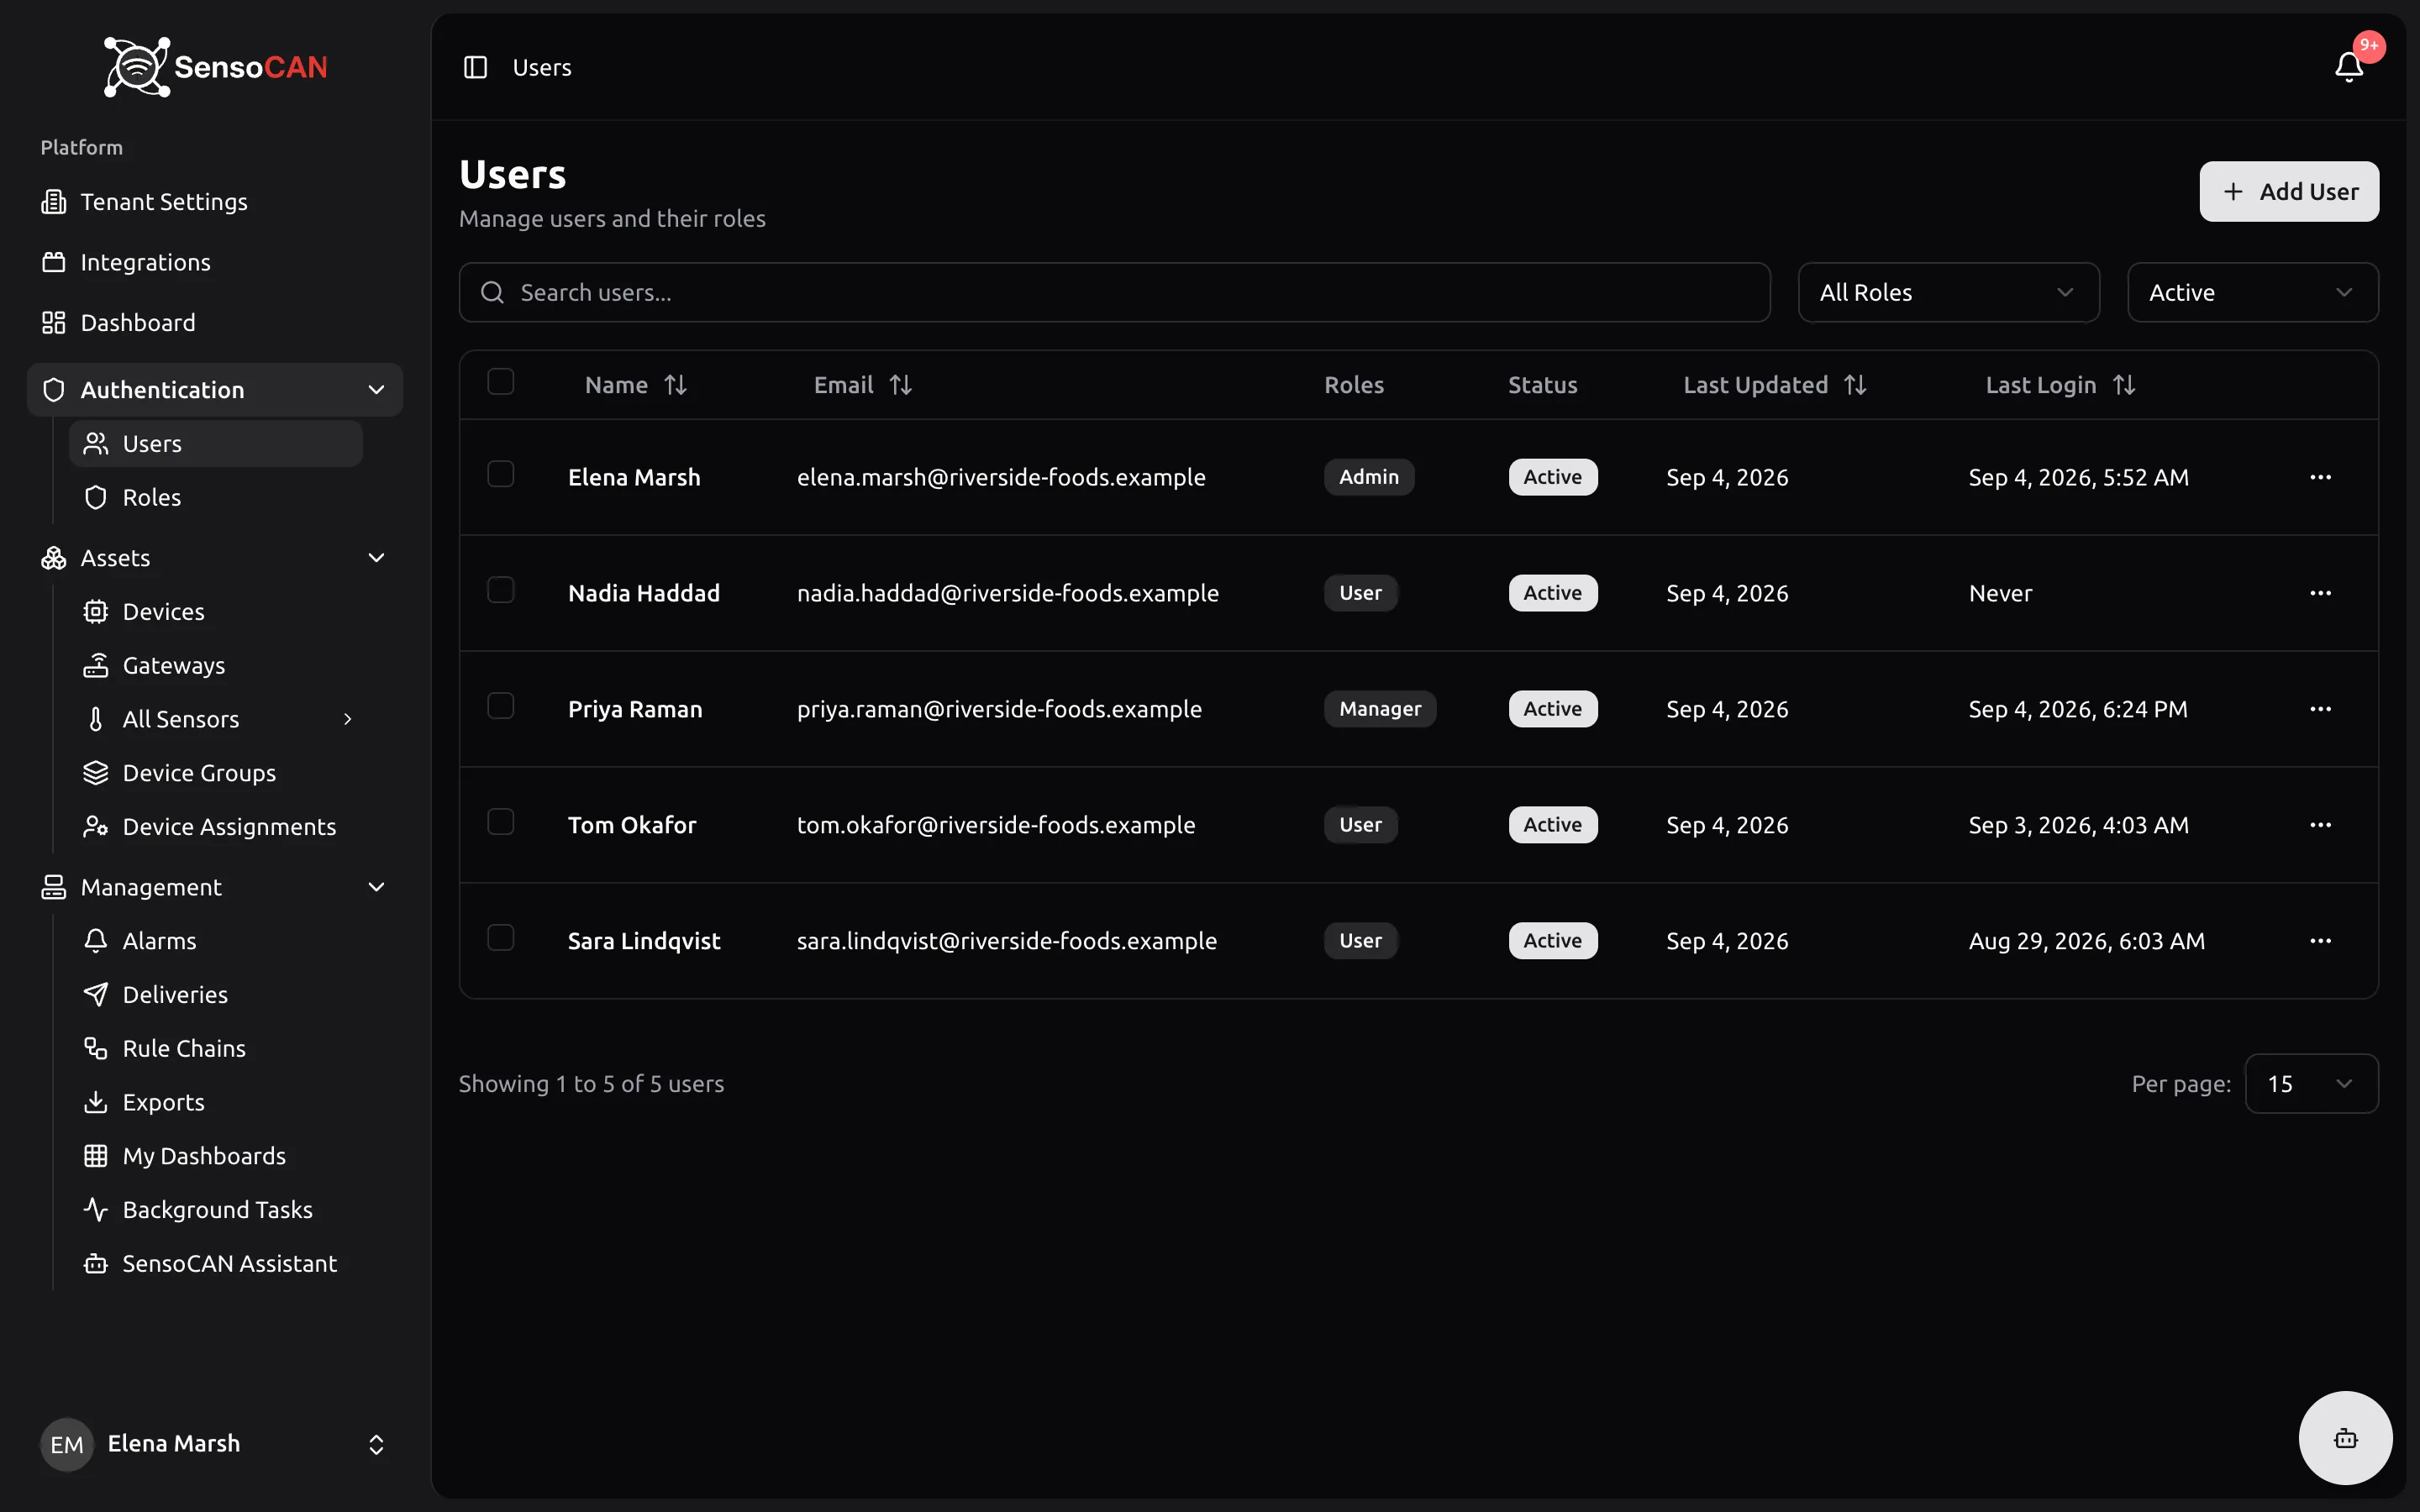
Everyone who signs in to SensoCAN belongs to a user account in your organisation. You manage those accounts from Authentication → Users in the sidebar. The page is titled Users, with the subtitle "Manage users and their roles".
The Admin role holds the whole Users permission group. The Manager role can see the list but cannot act on it, and the User role does not see the page at all — see Roles and permissions.
The user list
The toolbar above the table gives you three filters:
- A search box, Search users..., which matches on name and email.
- A role filter, All Roles by default.
- A status filter with two choices, Active and Deleted. Active is what you see when you arrive; switch to Deleted to review accounts that have been deleted but not yet permanently removed.
A Clear button appears as soon as a filter is set.
The columns are Name, Email, Roles, Status, Last Updated and Last Login — the last reads Never for someone who has not signed in yet. Status shows either Active or Deleted; there is no "invited" or "pending" badge, so the way to spot an outstanding invitation is the Resend Invitation action in the row menu.
The list is sorted by last updated, newest first, 15 rows to a page. Per page offers 10, 25, 50 and 100 as well.
Adding a user
Add User opens Create User — "Add a new user to the system". Fill in:
- Name — required, up to 255 characters.
- Email — required and must be a valid address. Email addresses are unique across SensoCAN, so if the address already belongs to an account you will see "This email address is already in use." Addresses are stored in lower case.
- Phone — optional, with a country picker.
- Roles — required. The field is labelled "Roles" but a user holds exactly one role, so this is a single choice with the placeholder "Select a role".
There is no permissions picker on the Create User screen. Extra permissions on top of the role can only be granted afterwards, on the Edit User screen.
Choosing how they get their password
Under Password Setup you pick one of two methods.
Send invitation email is the default. The description reads "User will receive an email with a secure link to set their own password." Below the choice, SensoCAN shows this notice:
The invitation link will expire in 48 hours. The user will set their own password via the secure link.
The account is created with a password nobody knows, and an email titled "You've Been Invited to SensoCAN" goes out. Opening the link brings the invitee to Set Your Password — "Welcome! Please set your password to complete your account setup." — with their name and email shown read-only and a Set Password & Continue button. Once they submit, their email address is confirmed and they are sent to the sign-in page with "Your password has been set successfully. You can now log in." They are not signed in automatically. A used or expired link shows "This invitation link is invalid or has expired."
Set password now reads "Enter a password for the user now." You type a password and confirm it; the minimum is 8 characters, as the field hints. The email address is treated as confirmed straight away and the person receives an email titled "Your Account Has Been Created". A Require password change switch appears with this method — "User will be required to change their password on first login." — and such a user is taken to a change-password page on arrival and cannot go anywhere else until they have changed it.
Invitations after they are sent
While an invitation is outstanding, the row menu offers Resend Invitation. The confirmation dialog is titled Resend Invitation? and explains: "A new invitation email will be sent to the address with a link valid for 48 hours. The link from the previous invitation stops working immediately." That is exactly what happens — resending rotates the link, so the previous email becomes useless. On success you see "Invitation resent. The link from the previous email no longer works."
An invitation can be resent three times per hour for the same user; beyond that you are told to try again in a few minutes. An invitation whose 48 hours have run out can still be resent, so you never need to delete and recreate the account. If the person has already accepted, or you created them with Set password now, resending is refused with "This user is not awaiting an invitation."
Editing a user
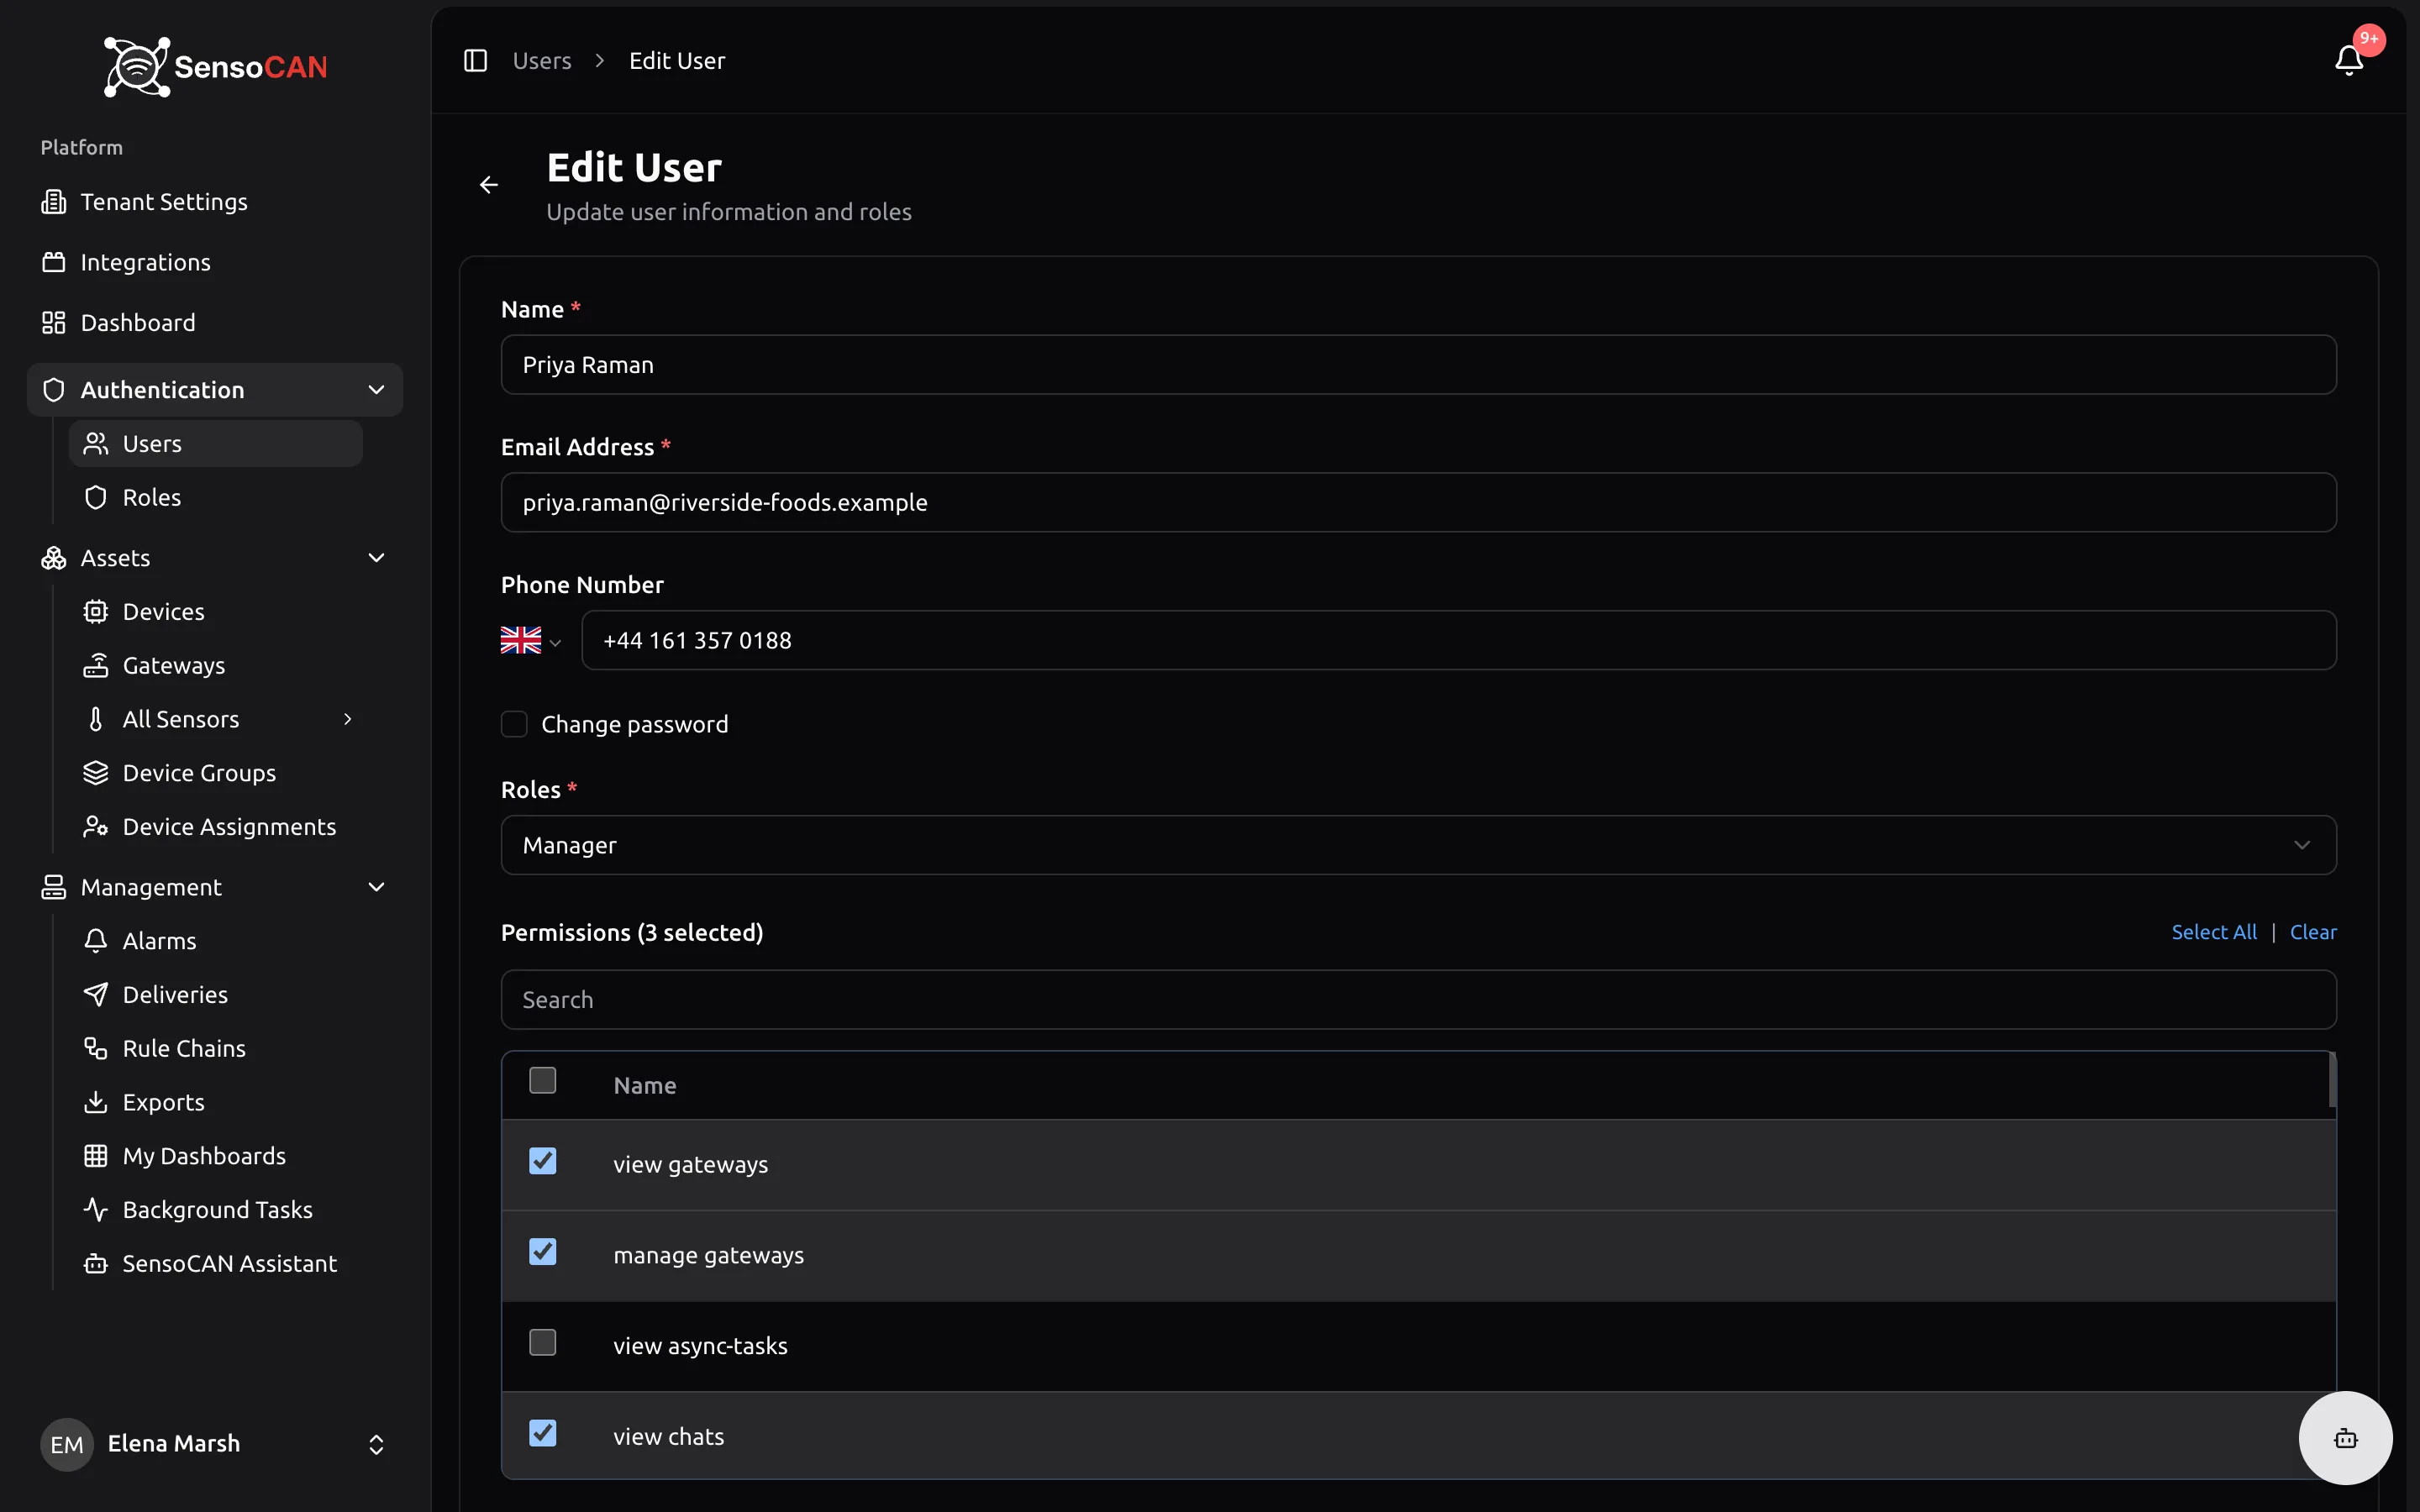
Edit opens Edit User — "Update user information and roles". The name, email, phone and role fields work exactly as on the create screen, plus two things that only exist here:
- A Permissions picker. This grants individual permissions on top of whatever the role already gives, for the times when one person needs a single extra capability without a new role. The picker hides permissions the chosen role already includes, so what you see are genuinely additional ones.
- A Change password checkbox. Ticking it reveals a password and confirmation field and a Require password change switch — on this screen the helper text reads "on next login". Setting a password here sends the user an email telling them an administrator changed it.
Changing someone's email address clears the confirmation on their account, so they are asked to confirm the new address before carrying on. Tell them before you do it.
A deleted user cannot be edited: their row shows Edit (Deleted), greyed out, and opening the edit screen directly is refused with "Cannot edit deleted user".
The row menu
The three-dot menu at the end of a row only appears if you can edit, delete or restore users — or if you are signed in as your organisation's System Admin account. A Manager, who can only view, sees no menu at all.
What the menu contains depends on the row:
| Item | When it appears |
|---|---|
| Edit | Always, for active users. Deleted users show Edit (Deleted), disabled. |
| Resend Invitation | Only while the user is still awaiting their invitation, and only on active rows. |
| Impersonate | Only for the System Admin account, and never on your own row, on a deleted user, on another System Admin, or while an impersonation is already running. |
| Restore | Only on deleted rows, for people who can restore users. |
| Delete | Relabelled Delete (Self) on your own row and Delete (Protected) on the System Admin's row. |
| Force Delete | Only on deleted rows. |
Impersonate signs you in as that person so you can see SensoCAN exactly as they do. A green banner — "Impersonation active — You are impersonating" plus their name — stays at the top of every page with a Stop Impersonating button that returns you to your own account.
Deleting, restoring and permanently deleting
Delete asks "Are you sure you want to delete this user?" and warns that the action cannot be undone. In practice the account is only deactivated: it stops working, its Status becomes Deleted, and it can be brought back with Restore — "This will restore the user account and allow them to access the system again."
Two rows refuse the action outright. Your own gives Cannot Delete Yourself — "You cannot delete your own account. Please ask another administrator to delete your account if needed." — with only a Close button. The System Admin's gives Cannot Delete System Admin — "You cannot delete a System Admin. System Admins have elevated permissions and must be managed through the management operator." Contact SensoCAN support if that account genuinely needs to change.
Force Delete, on deleted rows only, is the one that is truly permanent: the account and its data are removed and cannot be restored. You are told "User permanently deleted."
To remove several people at once, tick their checkboxes — deleted rows cannot be ticked, and the header checkbox selects active users only — then use Actions → Delete Selected. Your browser asks you to confirm the count. Your own account and already-deleted rows are skipped, and SensoCAN reports how many were deleted and how many were excluded.
First sign-in and two-factor authentication
New users sign in with their email address and the password they set. Anyone can turn on two-factor authentication for themselves from Settings → Two-Factor Auth — see Account settings.
For one account it is not optional. The account that created your organisation is marked as its System Admin, and after its first sign-in through the login form SensoCAN sends it to a two-factor setup page on every request until an authenticator app is registered: "Your organization requires two-factor authentication for administrator accounts." Recovery codes are shown at the end and the setup will not finish until you tick the box confirming you have saved them. Users invited later, Admins included, are not forced into this.
The System Admin marker is set by SensoCAN, not from any screen in your organisation. If it needs to move to a different account, contact SensoCAN support.
For a walkthrough aimed at the first few people you add, see Invite your team.