Consultant guide
A consultant account is for people who support SensoCAN organisations from the outside — integrators, installers, analysts and field engineers. You do not belong to any one organisation. Instead you are granted access to the organisations you work with, and you choose which one you are working in at any moment.
This guide is for consultants. If you administer an organisation and want to know what a consultant can do inside it, read Consultant access instead.
Signing in
Sign in with your email address and password exactly as any other SensoCAN user does. Instead of a dashboard, you land on Select Tenant.
If two-factor authentication is switched on for your account you are asked for a code first. You can turn it on yourself from Settings → Two-Factor Auth.
Choosing an organisation
Select Tenant lists every organisation you have been granted access to. Each card shows the organisation's name, its status, the date your access was assigned, and a Switch to this tenant link. The one you are currently working in carries an Active badge.
Pick an organisation and SensoCAN confirms with "Switched to tenant" and the organisation's name. From that point, everything you open belongs to that organisation and nothing else — its devices, its sensors, its groups, its gateways. There is no combined view across organisations, and no organisation you have not been given can be reached.
If you have not been given access to anything yet, the page reads "No Tenants Assigned — You have not been assigned to any tenants yet. Please contact your administrator to request access."
An organisation whose account has been placed on hold, suspended or cancelled cannot be selected. Trying tells you "Your account is currently restricted. Please contact support." Its administrator has to resolve that with SensoCAN before you can carry on; nothing you can do from your side will restore access.
If you open a page before choosing an organisation, you are returned to the selector with "Please select a tenant to continue."
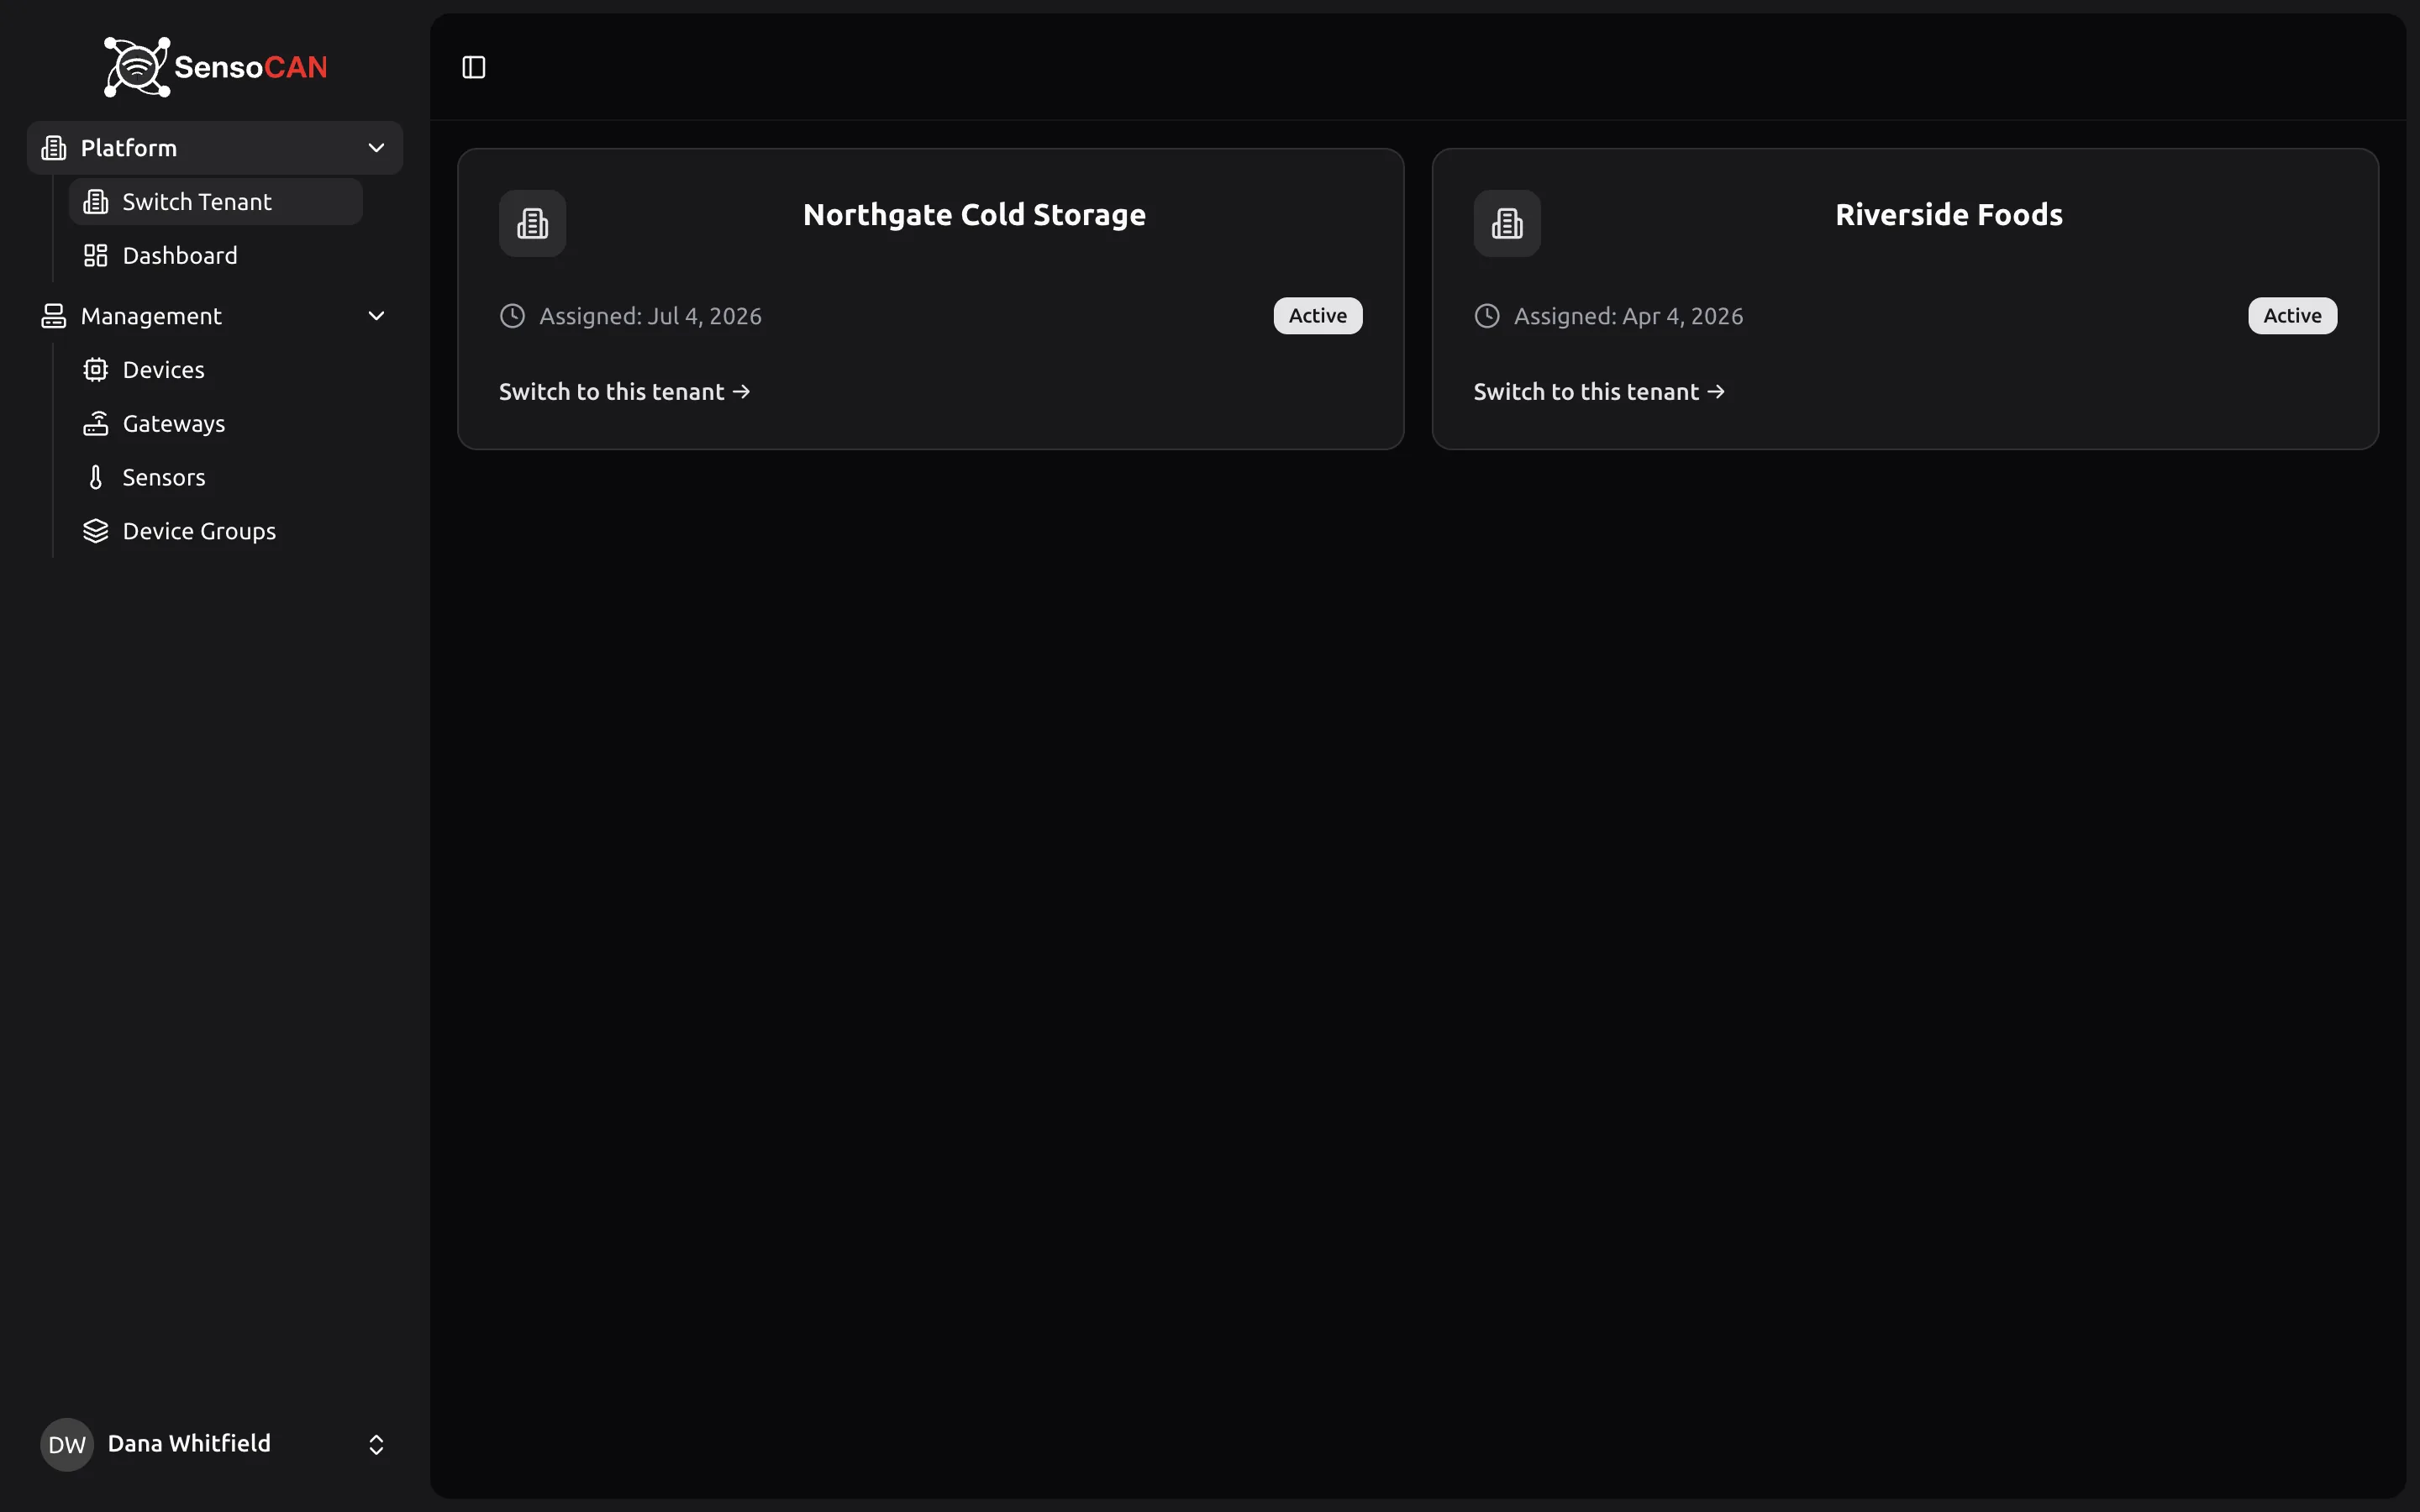
Finding your way around
The sidebar has two groups:
- Platform — Switch Tenant and Dashboard.
- Management — Devices, Gateways, Sensors and Device Groups.
The name of the organisation you are currently in is shown as a bar under the header. It is clickable, and takes you straight back to the selector — use it to check which organisation you are looking at before you change anything or take a screenshot for a report.
Dashboard
The dashboard summarises the active organisation: cards for Total Devices, Online Devices, Total Sensors and Device Groups, a Number of Sensors by Type breakdown, and an All Sensors table with a type filter that defaults to All Types. Sensors that are currently reporting are listed first, so problems surface near the top.
Devices
Devices lists the active organisation's devices, with a search that matches on name, location and device identifier, and a status filter. Devices that are online sort first.
Unlike an ordinary user of that organisation, you are not limited to devices assigned to you — you see all of them, which is what makes the account useful for commissioning and fault-finding.
Opening a device shows its Device Information, its Device Status, when it was Last Connected, its email and SMS notification recipients, and the sensors attached to it. Edit Device lets you correct the device's own details, and you can change its status.
You cannot create a device or delete one. Those stay with the organisation's own administrators.
Sensors
There are two ways into sensors. Sensors in the sidebar is a read-only list of every sensor in the active organisation. Opening a device instead gives you that device's sensors with the full set of actions.
A sensor's page shows its current reading and its history. Live Data shows real-time readings as they arrive; Historical and Aggregated let you look back over a period, with hourly or daily aggregation showing mean, minimum and maximum values.
Two things you can change:
- Edit Sensor — the sensor's own details, such as its name and description.
- Profile — "Adjust thresholds and monitoring parameters". The fields offered depend on the sensor's type, and a Schema Reference panel lists the available fields and their constraints. Sensor types with nothing to configure say so.
Adjusting a profile is how you tune when a sensor is considered out of range, so it is the setting most likely to be the reason you were asked to help. Change it deliberately, and tell the organisation what you changed.
You cannot add or delete sensors.
Device Groups
Device Groups is read-only. You can browse the organisation's groups, see which devices belong to each one, and view the sensor data from all the devices in a group. You cannot create, rename or delete a group.
Gateways
Gateways lists the active organisation's gateways with their status, when each was last seen, how many beacons it relays, and how many commands are currently in flight. A status filter narrows the list.
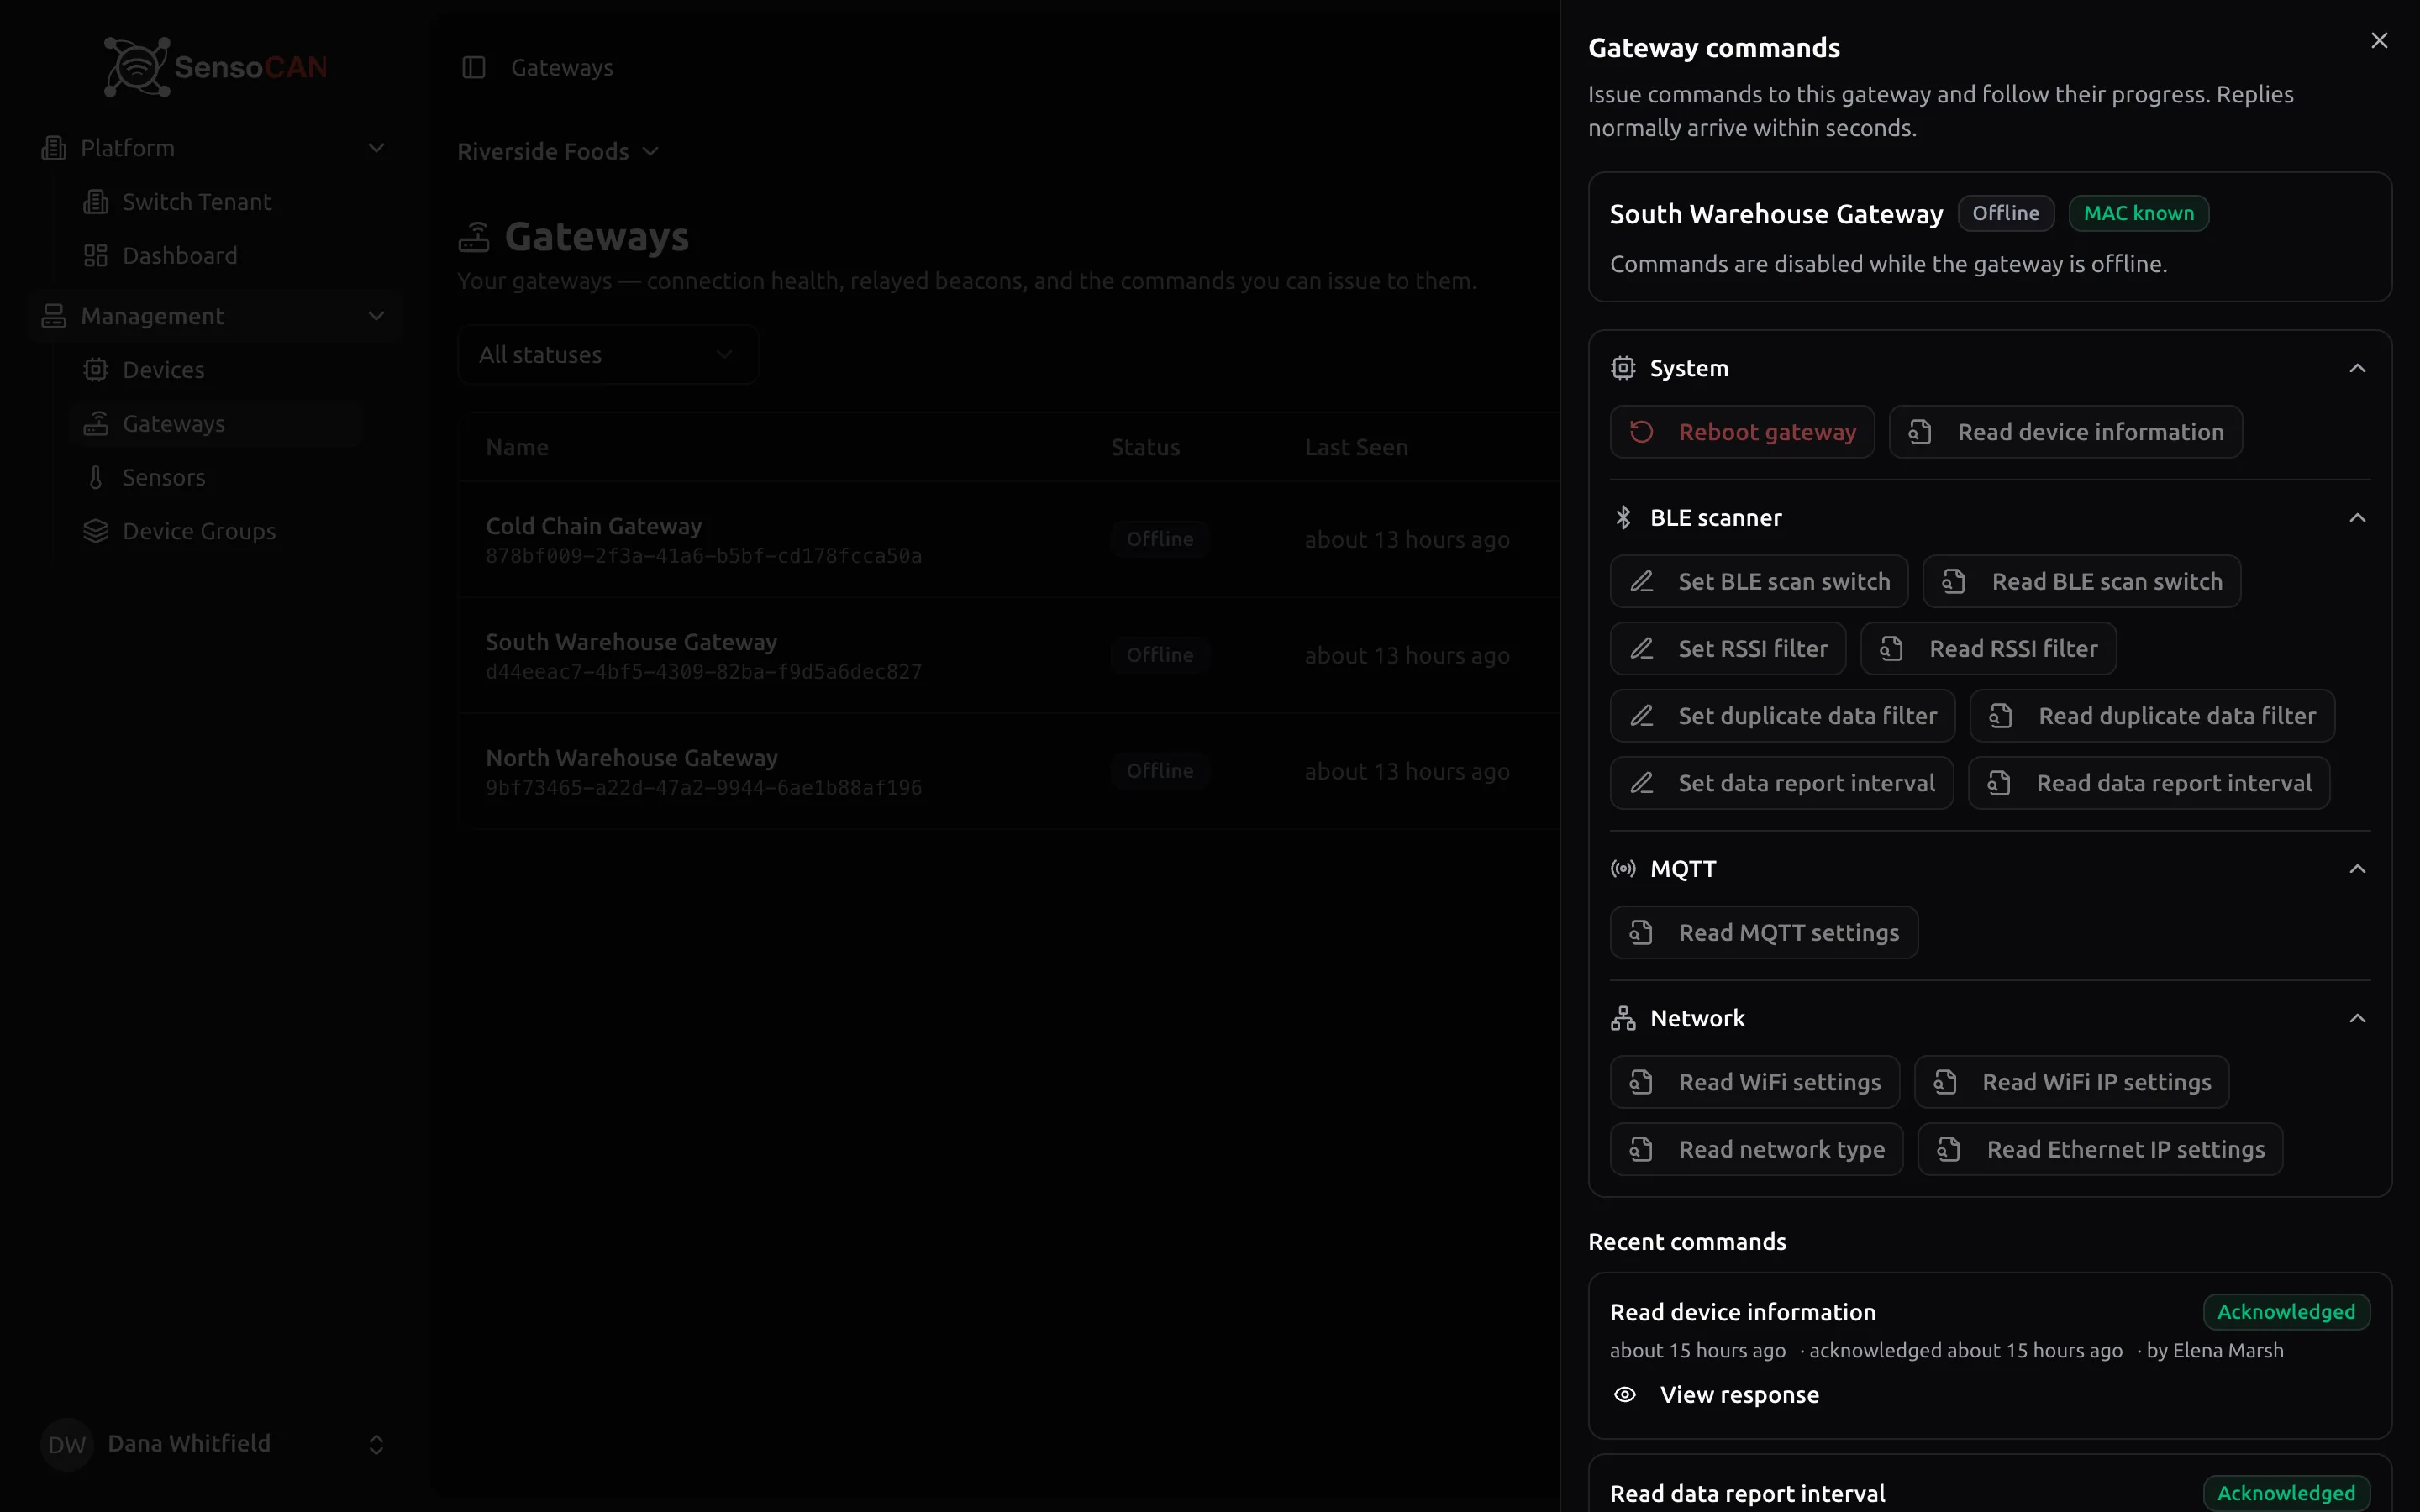
Opening a gateway gives you the command drawer — "Issue commands to this gateway and follow their progress. Replies normally arrive within seconds." It shows the most recent commands with their outcome (Pending, Sent, Acknowledged, Failed or Timed out), who issued them, and a View response link when the gateway returned data.
You can run:
- Read device information, and the read-outs for the BLE scanner settings, the connection settings and the network settings.
- Set BLE scan switch, Set RSSI filter, Set duplicate data filter and Set data report interval — the settings that control what the gateway relays and how often.
- Reboot gateway. This one asks you to type the gateway's name to confirm, and warns that the gateway will restart and its beacons stop relaying until it comes back online.
You cannot run firmware upgrades, and you cannot repoint a gateway to a different server. Those commands never appear on your side; if a gateway needs one, contact SensoCAN.
Commands are refused, with the reason shown in the drawer, when the gateway is offline, when it has not yet reported its identity, or when the same command is already in flight. A command that gets no reply is closed as Timed out rather than left hanging.
Full detail on gateway commands and beacons is in Gateways and beacons.
What is not in the consultant workspace
Your workspace deliberately stops short of the organisation's own administration. You will not find:
- Users, roles or permissions.
- Organisation settings or integrations.
- Alarms, rule chains, deliveries, exports or background tasks.
- The AI assistant.
If you need something from one of those areas — a data export, a rule chain change, a new device — ask the organisation's administrator to do it or to grant one of their own users what is needed. See Devices for how the organisation's own device screens work.
Your own account
Settings in the user menu holds your Profile (name, phone, email address and time zone), Password, Two-Factor Auth, Linked Accounts and Appearance. Changing your email address there sends a confirmation link to the new address, and the change only takes effect once you click it.
Deleting your account from the Profile page is permanent and immediate. It does not just remove you from an organisation — it removes the account. If you have finished with one organisation but still work with others, ask for that access to be withdrawn instead.
Good practice
Keep your own record of which organisations you have access to and why. Treat everything you see as confidential to the organisation it belongs to, and check the organisation name in the header bar before you edit anything or take a screenshot for a report. Where you find something that needs a change you cannot make, raise it with the organisation rather than working around it.