Connect your first device
Getting hardware into SensoCAN is three moves: create the device, add a sensor, and point your firmware at the credentials the platform hands you.
Create the device
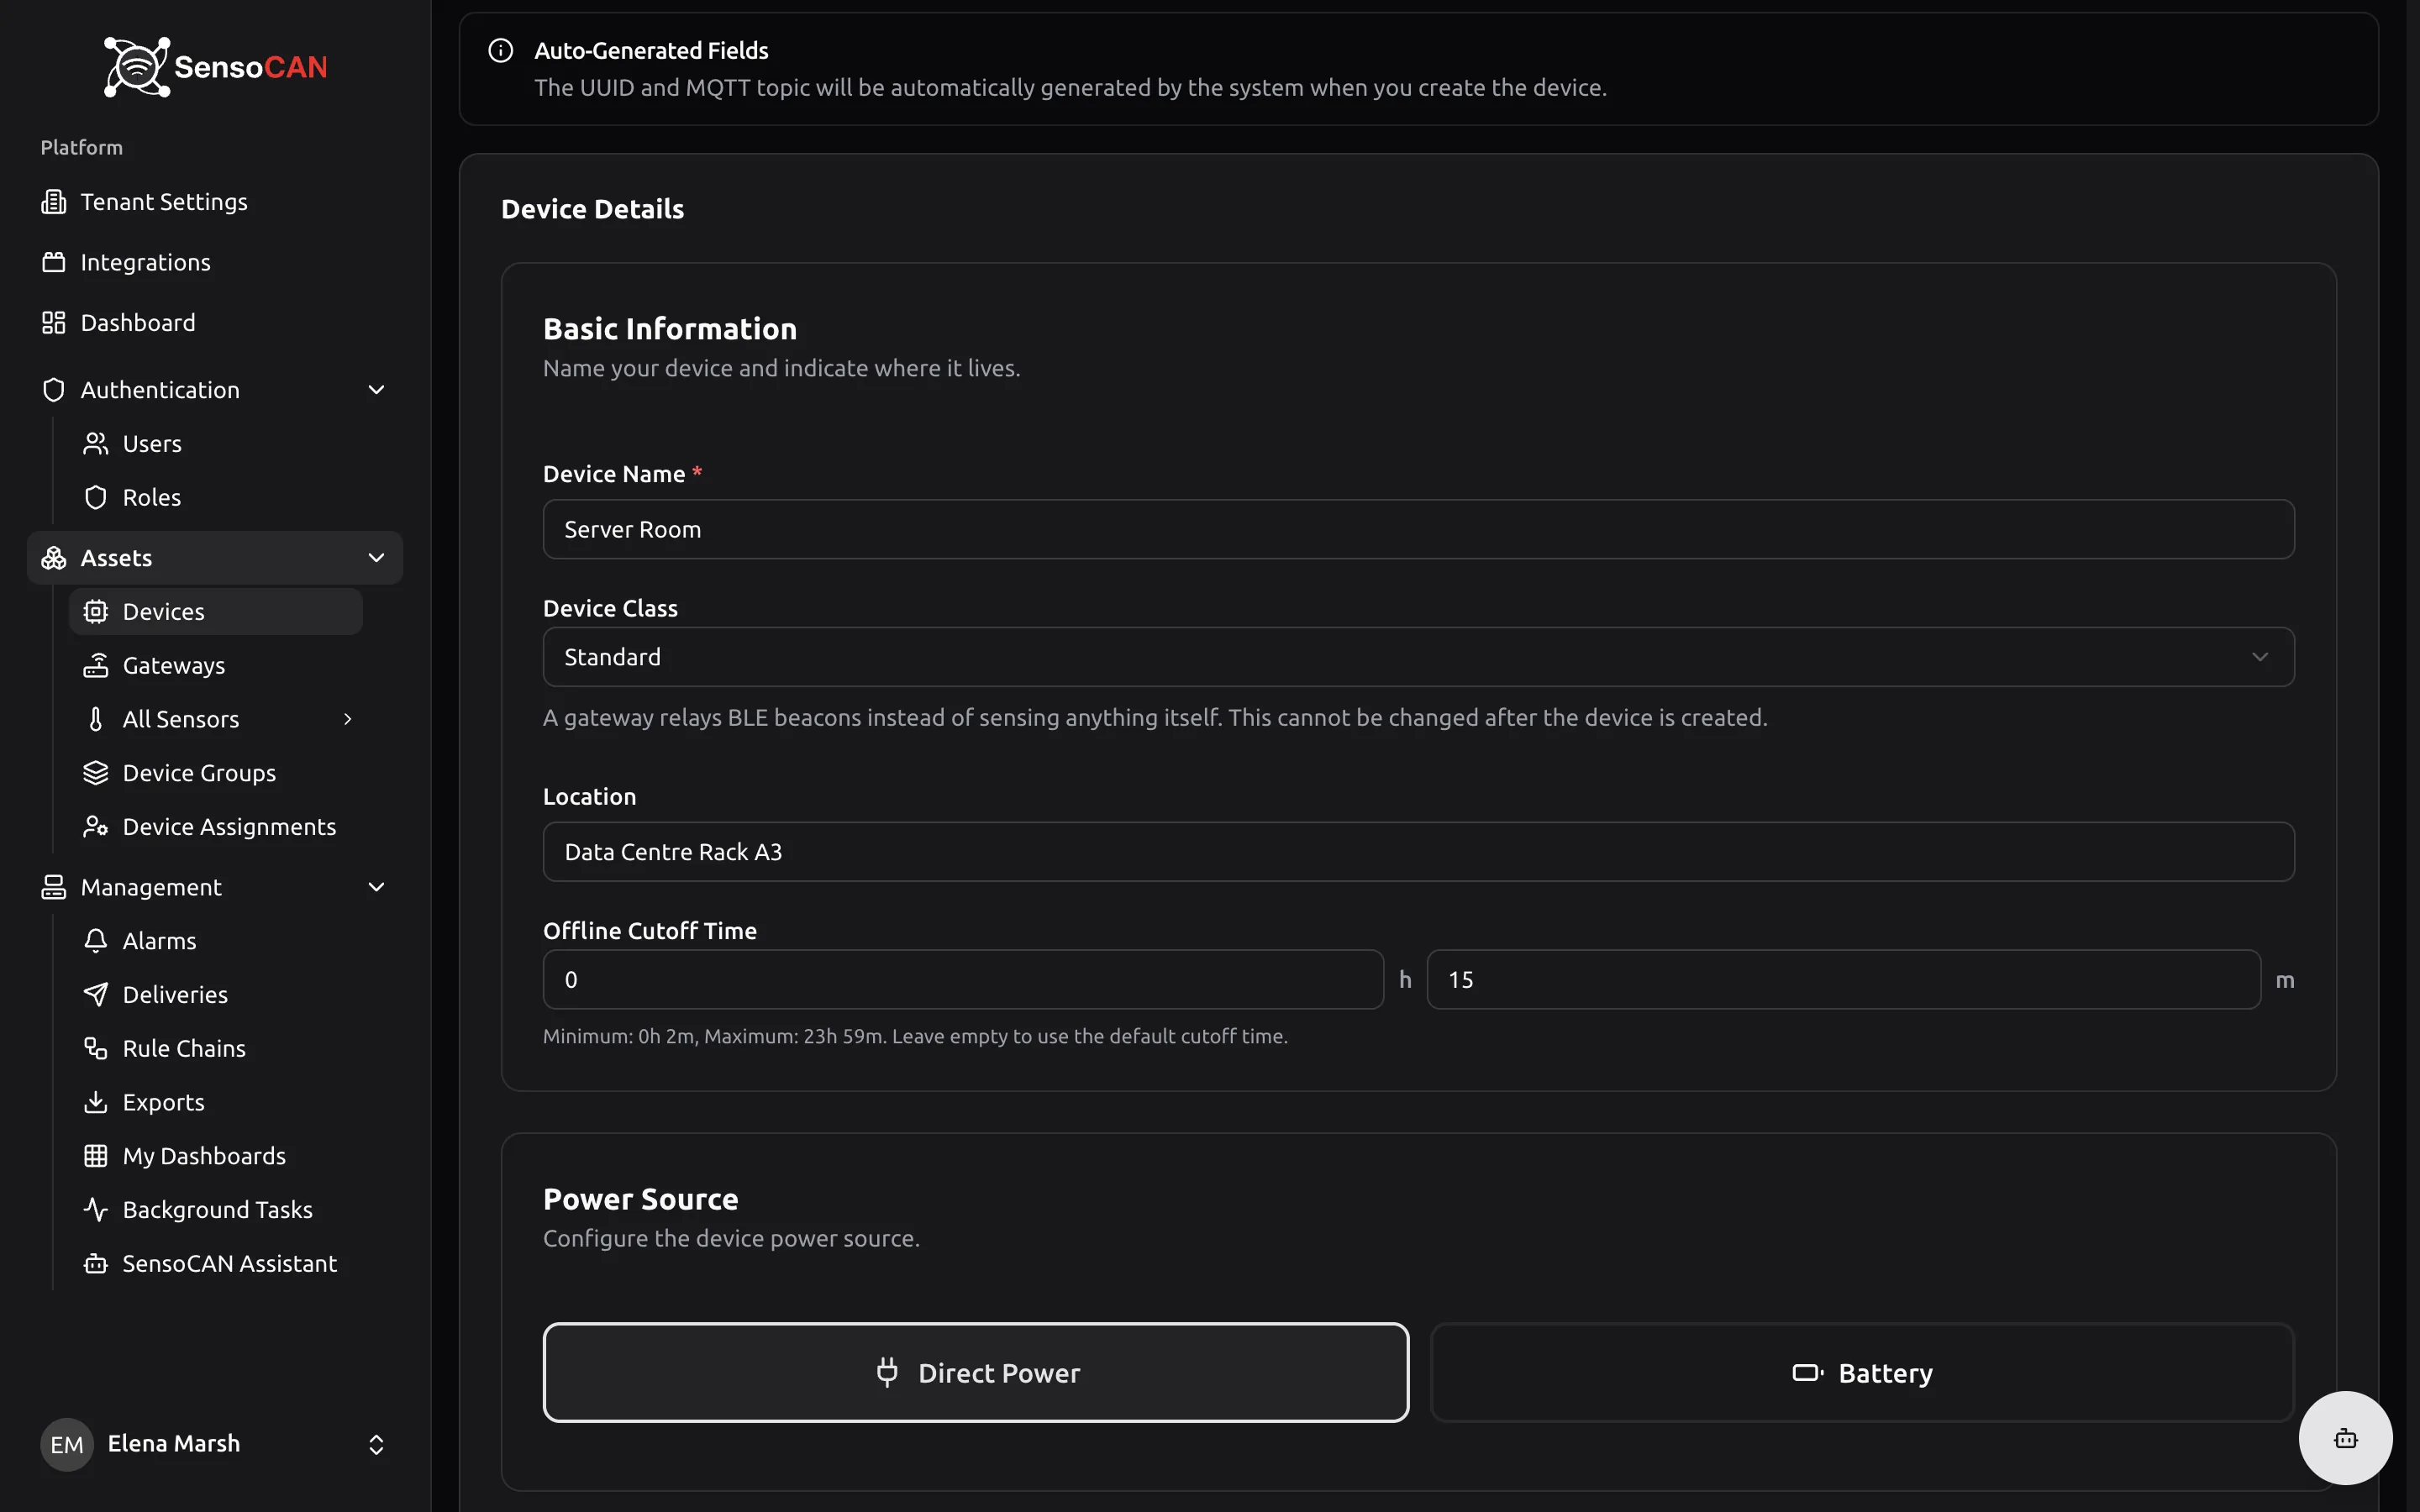
Go to Devices → Add Device. The page is titled Create Device and opens with a note that the UUID and MQTT topic are generated for you when you save.
Fill in Basic Information:
- Device Name — required. Letters, numbers, spaces, underscores and hyphens only.
- Device Class — Standard for hardware that measures something itself, Gateway for a unit that relays BLE beacons. Fixed once the device is created.
- Location — optional, and worth filling in: the device list searches on it, and alert messages can include it.
- Offline Cutoff Time — how long this device may stay silent before SensoCAN marks it offline. Leave it empty for the default, or set it a little longer than your firmware's reporting interval.
Under Power Source, choose Direct Power, or Battery and the Battery Type matching the cells you fitted — that is what turns reported voltage into a battery level percentage.
Notification Recipients and Notification Settings can wait; they are covered in Devices. Choose Create Device.
Add a sensor
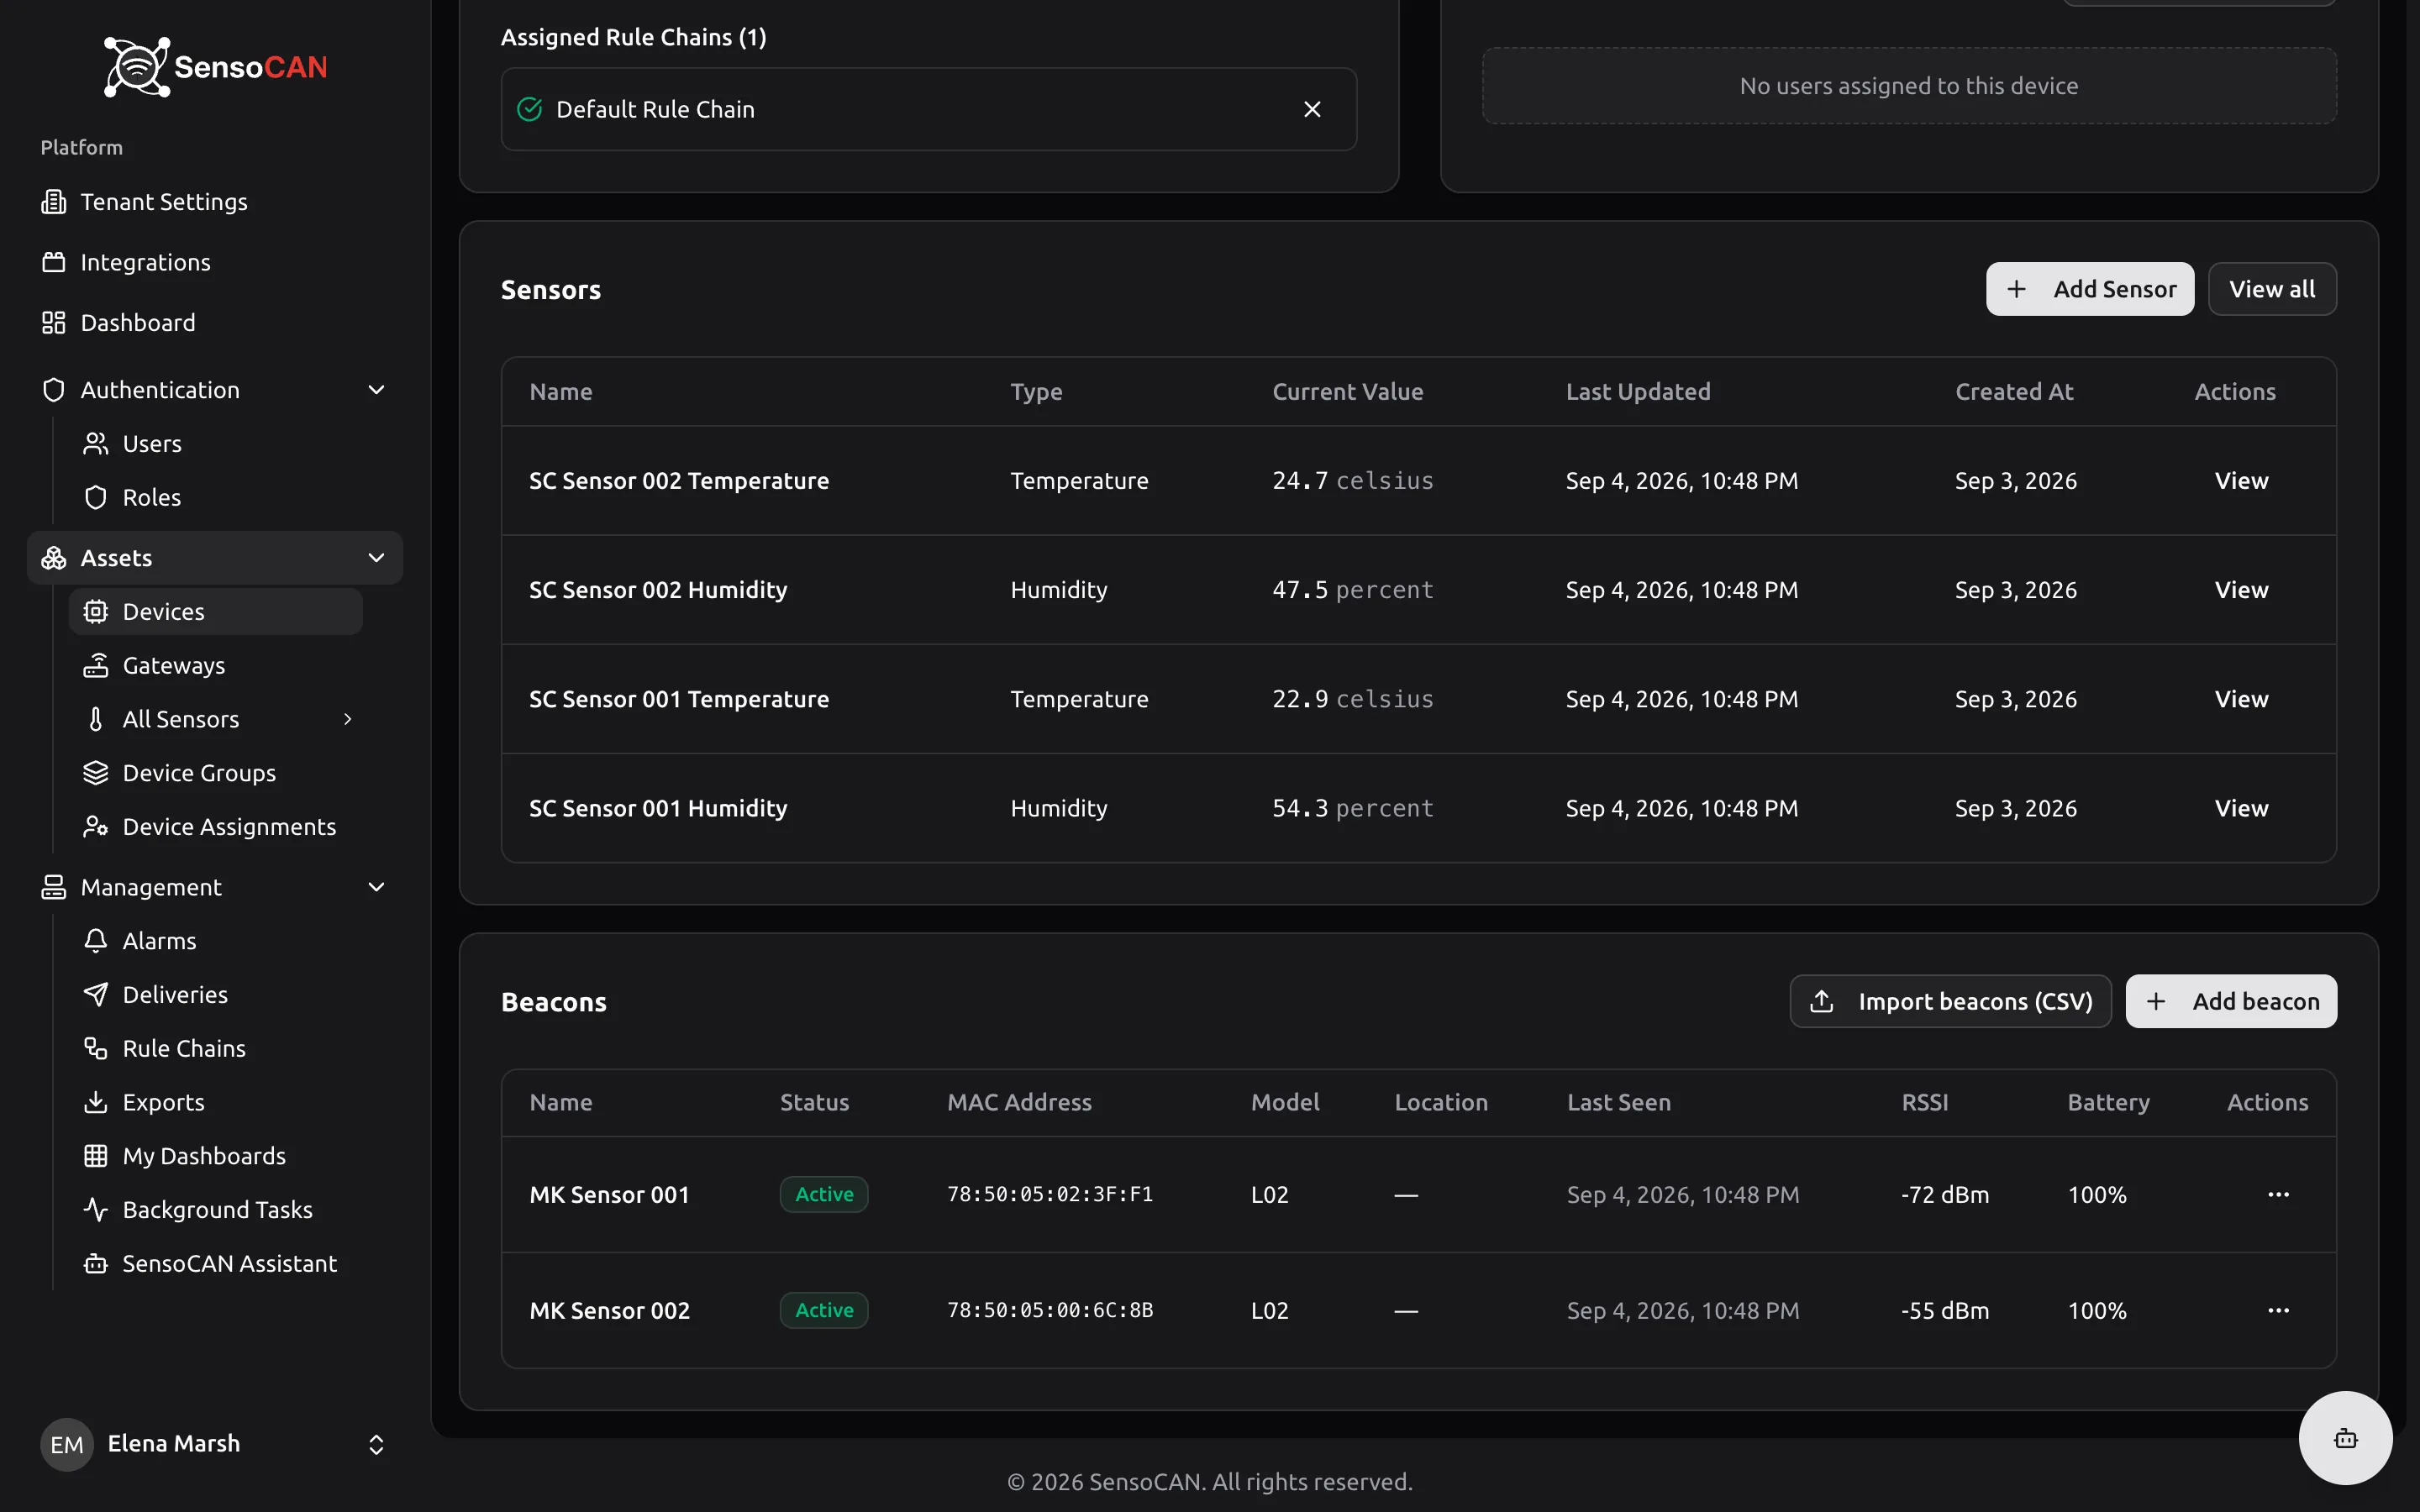
Open the new device from the list. Its Sensors card is at the bottom — choose Add Sensor.
- Sensor Name — required, and unique on this device.
- Sensor Type — temperature, humidity, pressure, current, door or water. This cannot be changed later, so pick the one matching what the hardware measures.
A standard device may hold only one sensor of each type; gateways are exempt. Saving creates a profile filled with the type's defaults — thresholds, sensitivity margins, business hours — which you tune later on the sensor's own page. See Sensors.
Collect the credentials
Everything your firmware needs is on the device page: the Device UUID and the MQTT topic, each with a copy button, in the Device Information card; the MQTT username and password behind MQTT Credentials; the access token behind Show Token; and each sensor's identifiers on the sensor's own page.
Beside the MQTT topic sits MQTT Payload Examples — ready-made topics and payloads filled in with this device's real identifiers, for a single reading, a bulk, a batch across sensors, and a battery-only message. Copy from there rather than typing by hand.
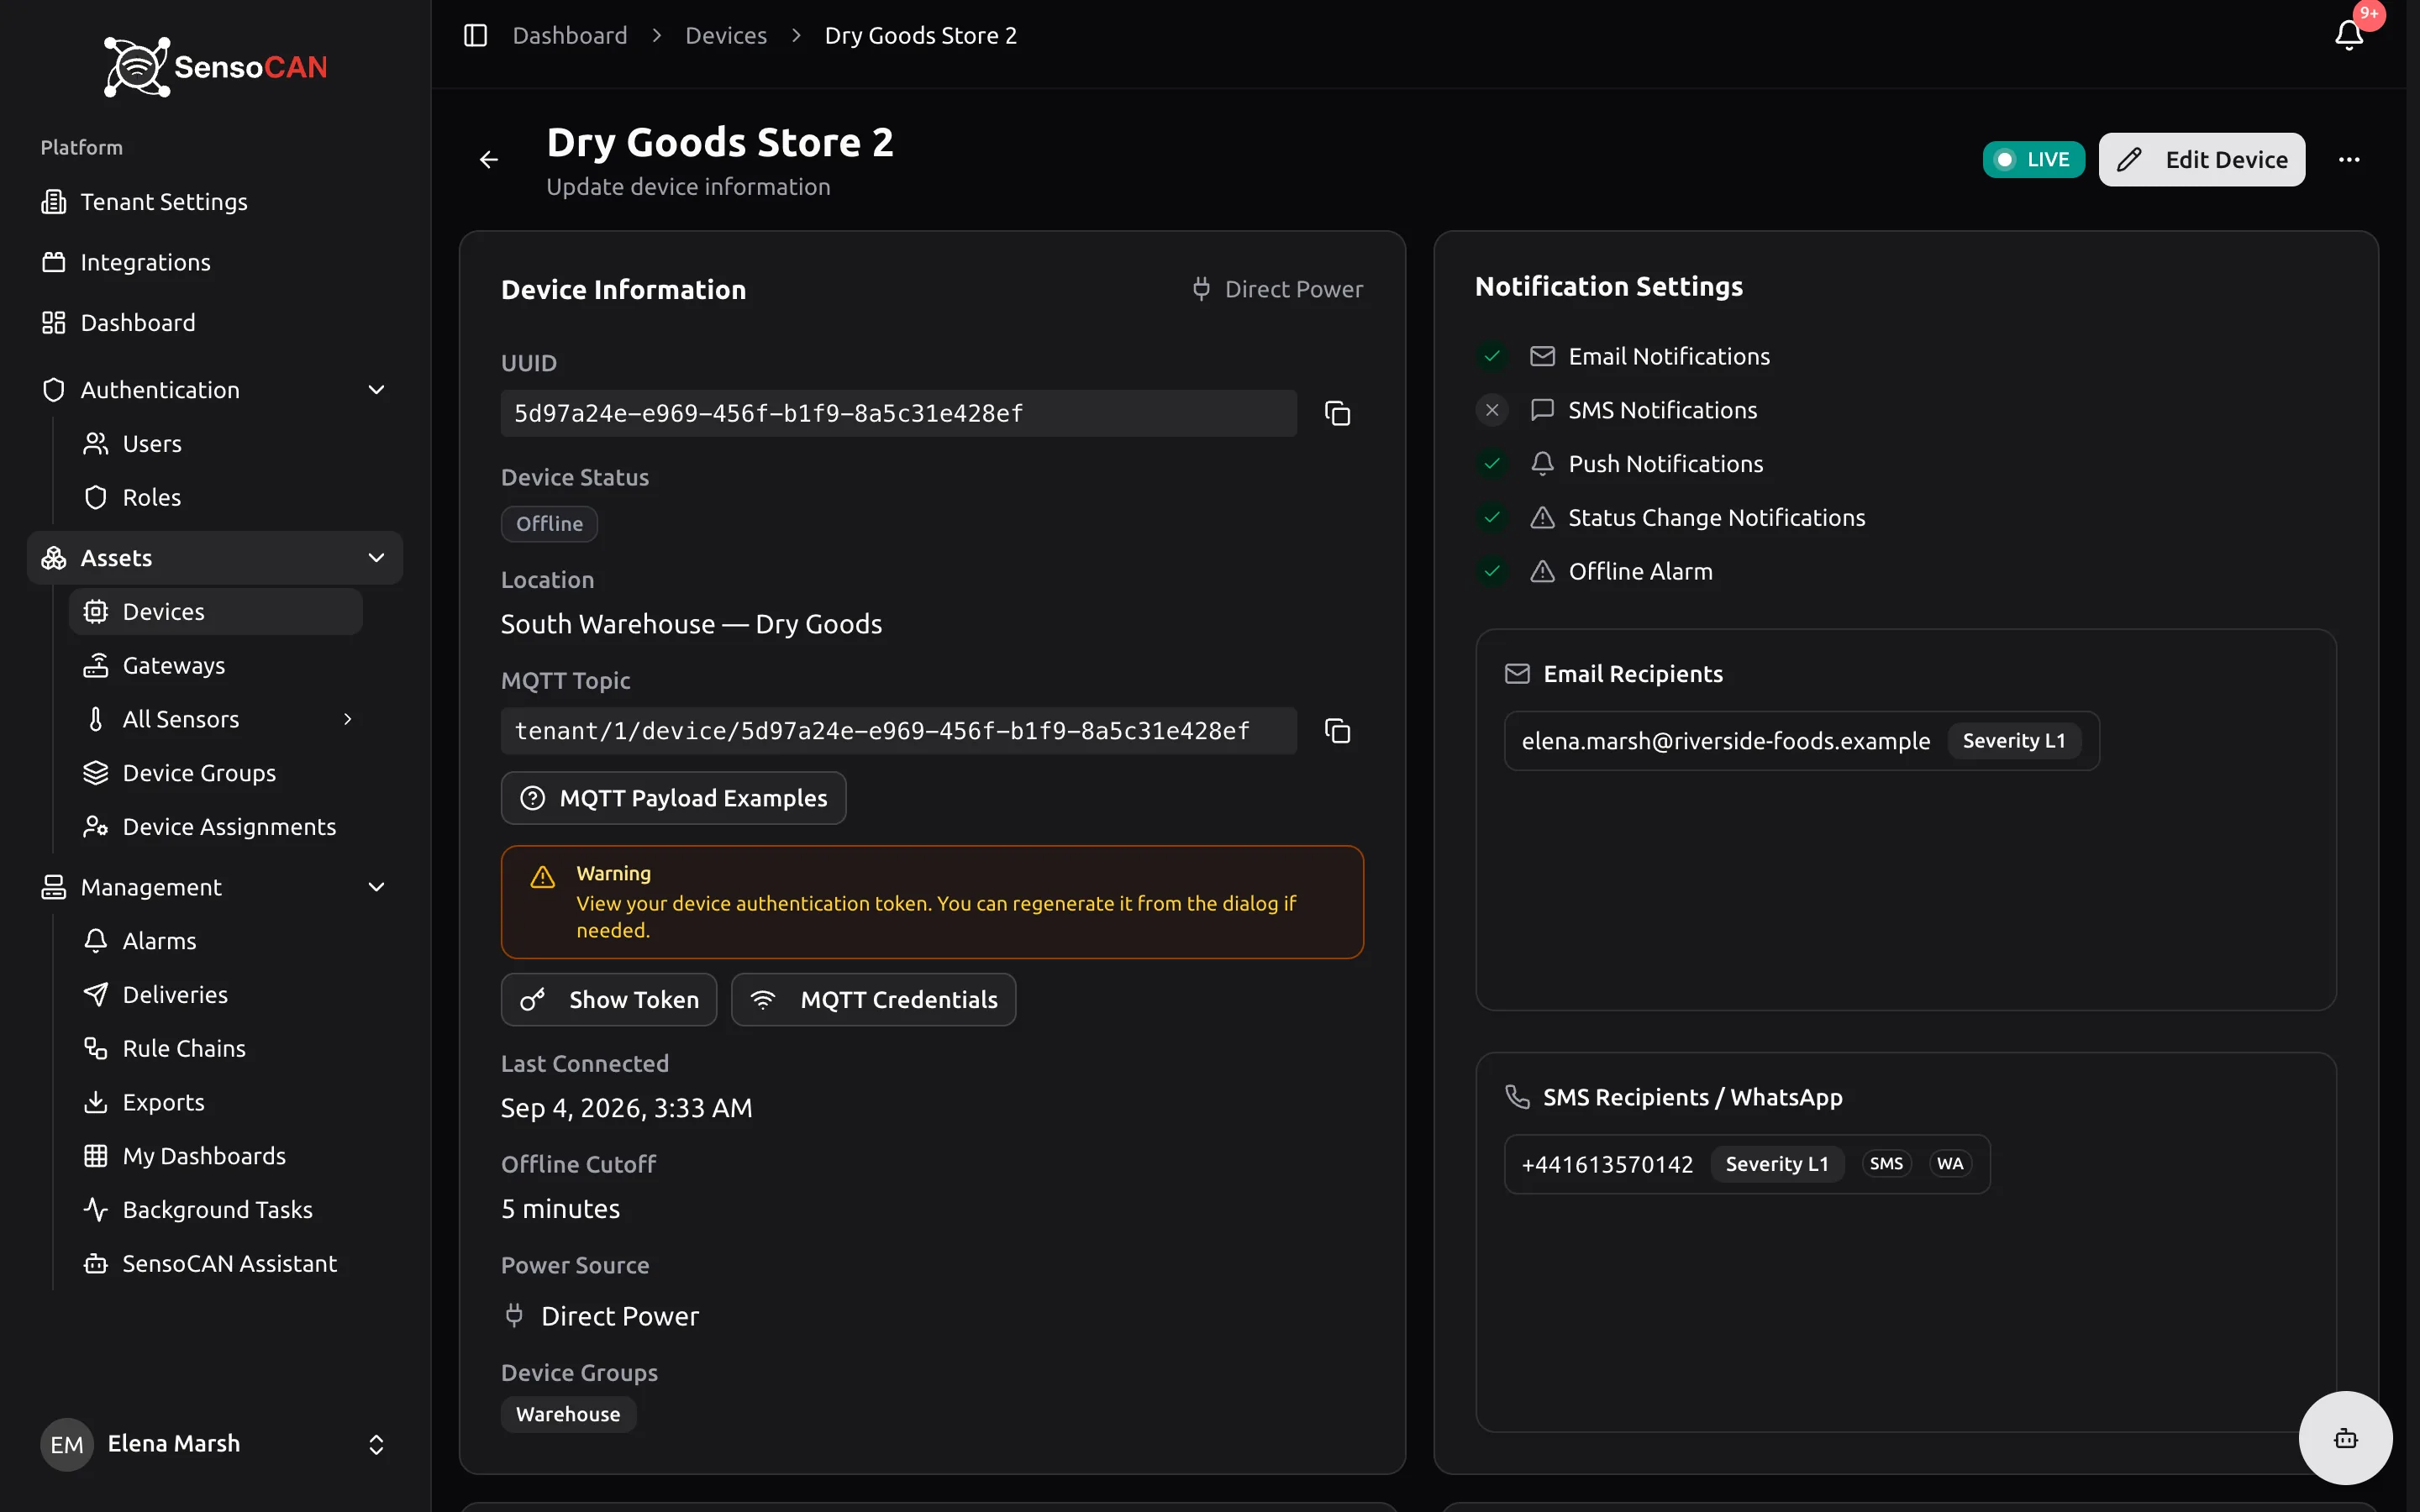
Anyone holding the access token or the MQTT password can send readings as this device. Regenerating the access token takes effect immediately; the MQTT password is generated once and cannot be rotated from the UI — contact SensoCAN support if it needs to change.
Send the first reading
The payload contract is the same whichever protocol you use, and it lives in Connect your devices — read that page next, then follow MQTT or the HTTP API.
An HTTP request answers with what happened to every reading in it; an MQTT publish cannot. Send one reading over HTTP first and read the response, then switch to MQTT if that is where you are heading.
Watch it arrive
Leave the device page open. When the first message is processed:
- The Device Status badge flips to Online, and the page shows a Live badge while real-time updates are connected.
- Last Connected shows when the message arrived, and refreshes on every message after it.
- In the Sensors card, the sensor's Current Value appears with its unit, marked Live, alongside Last updated.
Open the sensor itself for the full picture: a gauge, an in-range or out-of-threshold badge, and Live Data, Historical and Aggregated tabs.
If nothing shows up
- Check the rule chain first. Readings are only stored when they reach a save step in the chain that applies to the device. The Rule Chain Assignments card warns you in red when no chain applies or the default is inactive — and in that state your firmware is still told its readings were accepted. See Rule chains.
- Check the sensor you addressed. It must exist on this device.
- Check the credentials. Regenerating the access token means reflashing the device.
Once readings stop, the device is marked offline after it has been silent longer than its Offline Cutoff Time. That check runs every couple of minutes, so allow a short lag.
If you have a BLE gateway instead
Create the device with the Gateway class instead, and an extra field appears for the client ID it will connect with. A gateway measures nothing itself — you register the beacons it relays, one at a time or by CSV import, and SensoCAN creates the sensors each reports. Its MQTT Credentials dialog carries the commissioning values to enter into supported BLE gateways. Gateways and beacons covers the flow.
Who can see this device
A device you just created is visible to the organisation owner and nobody else until people are assigned to it, whatever role they hold. Invite your team covers that.