Create your account
Signing up creates two things: your own login, and the organisation that will hold your devices and your team. Whoever signs up becomes its owner.
Then you do not need this page — open the link in your invitation email and set a password. See Invite your team.
Before you start, have an email address never used on SensoCAN, a phone number in international format, and an authenticator app on your phone for the last step.
On the sign-in page, under New to SensoCAN?, choose Sign Up. The page is titled Welcome to SensoCAN and runs through four steps: Email, Verify, Account, Done.
Step 1 — Email
The card reads Welcome — Enter your email to get started. Type your address into Email Address and choose Continue.
The address must not already belong to a SensoCAN user; if it does, use Already have an account? Log in instead.
SensoCAN emails you a six-digit code, subject "Verification Code - SensoCAN".
Step 2 — Verify Email
The card reads Verify Email — We sent a 6-digit code to your email. Type it into the six boxes; the form submits itself on the sixth digit.
Two things to know about the code:
- It expires after 10 minutes. Use the back arrow to return to the email step and ask for a new one; requesting a new code retires the previous one, so always use the newest email.
- Five wrong attempts kill it. You will see "Invalid or expired OTP." — go back and request a fresh one.
Step 3 — Setup Account
The card reads Setup Account — Fill in your details to create your account. Fill in:
- Your Name — required.
- Phone Number — required, in international format.
- Password and Confirm Password — required, at least 8 characters, and identical.
- Add company name (optional) — expand it to enter a Company Name. You can set this later; leave it blank and your organisation is named from the first part of your email address.
Choose Create Account.
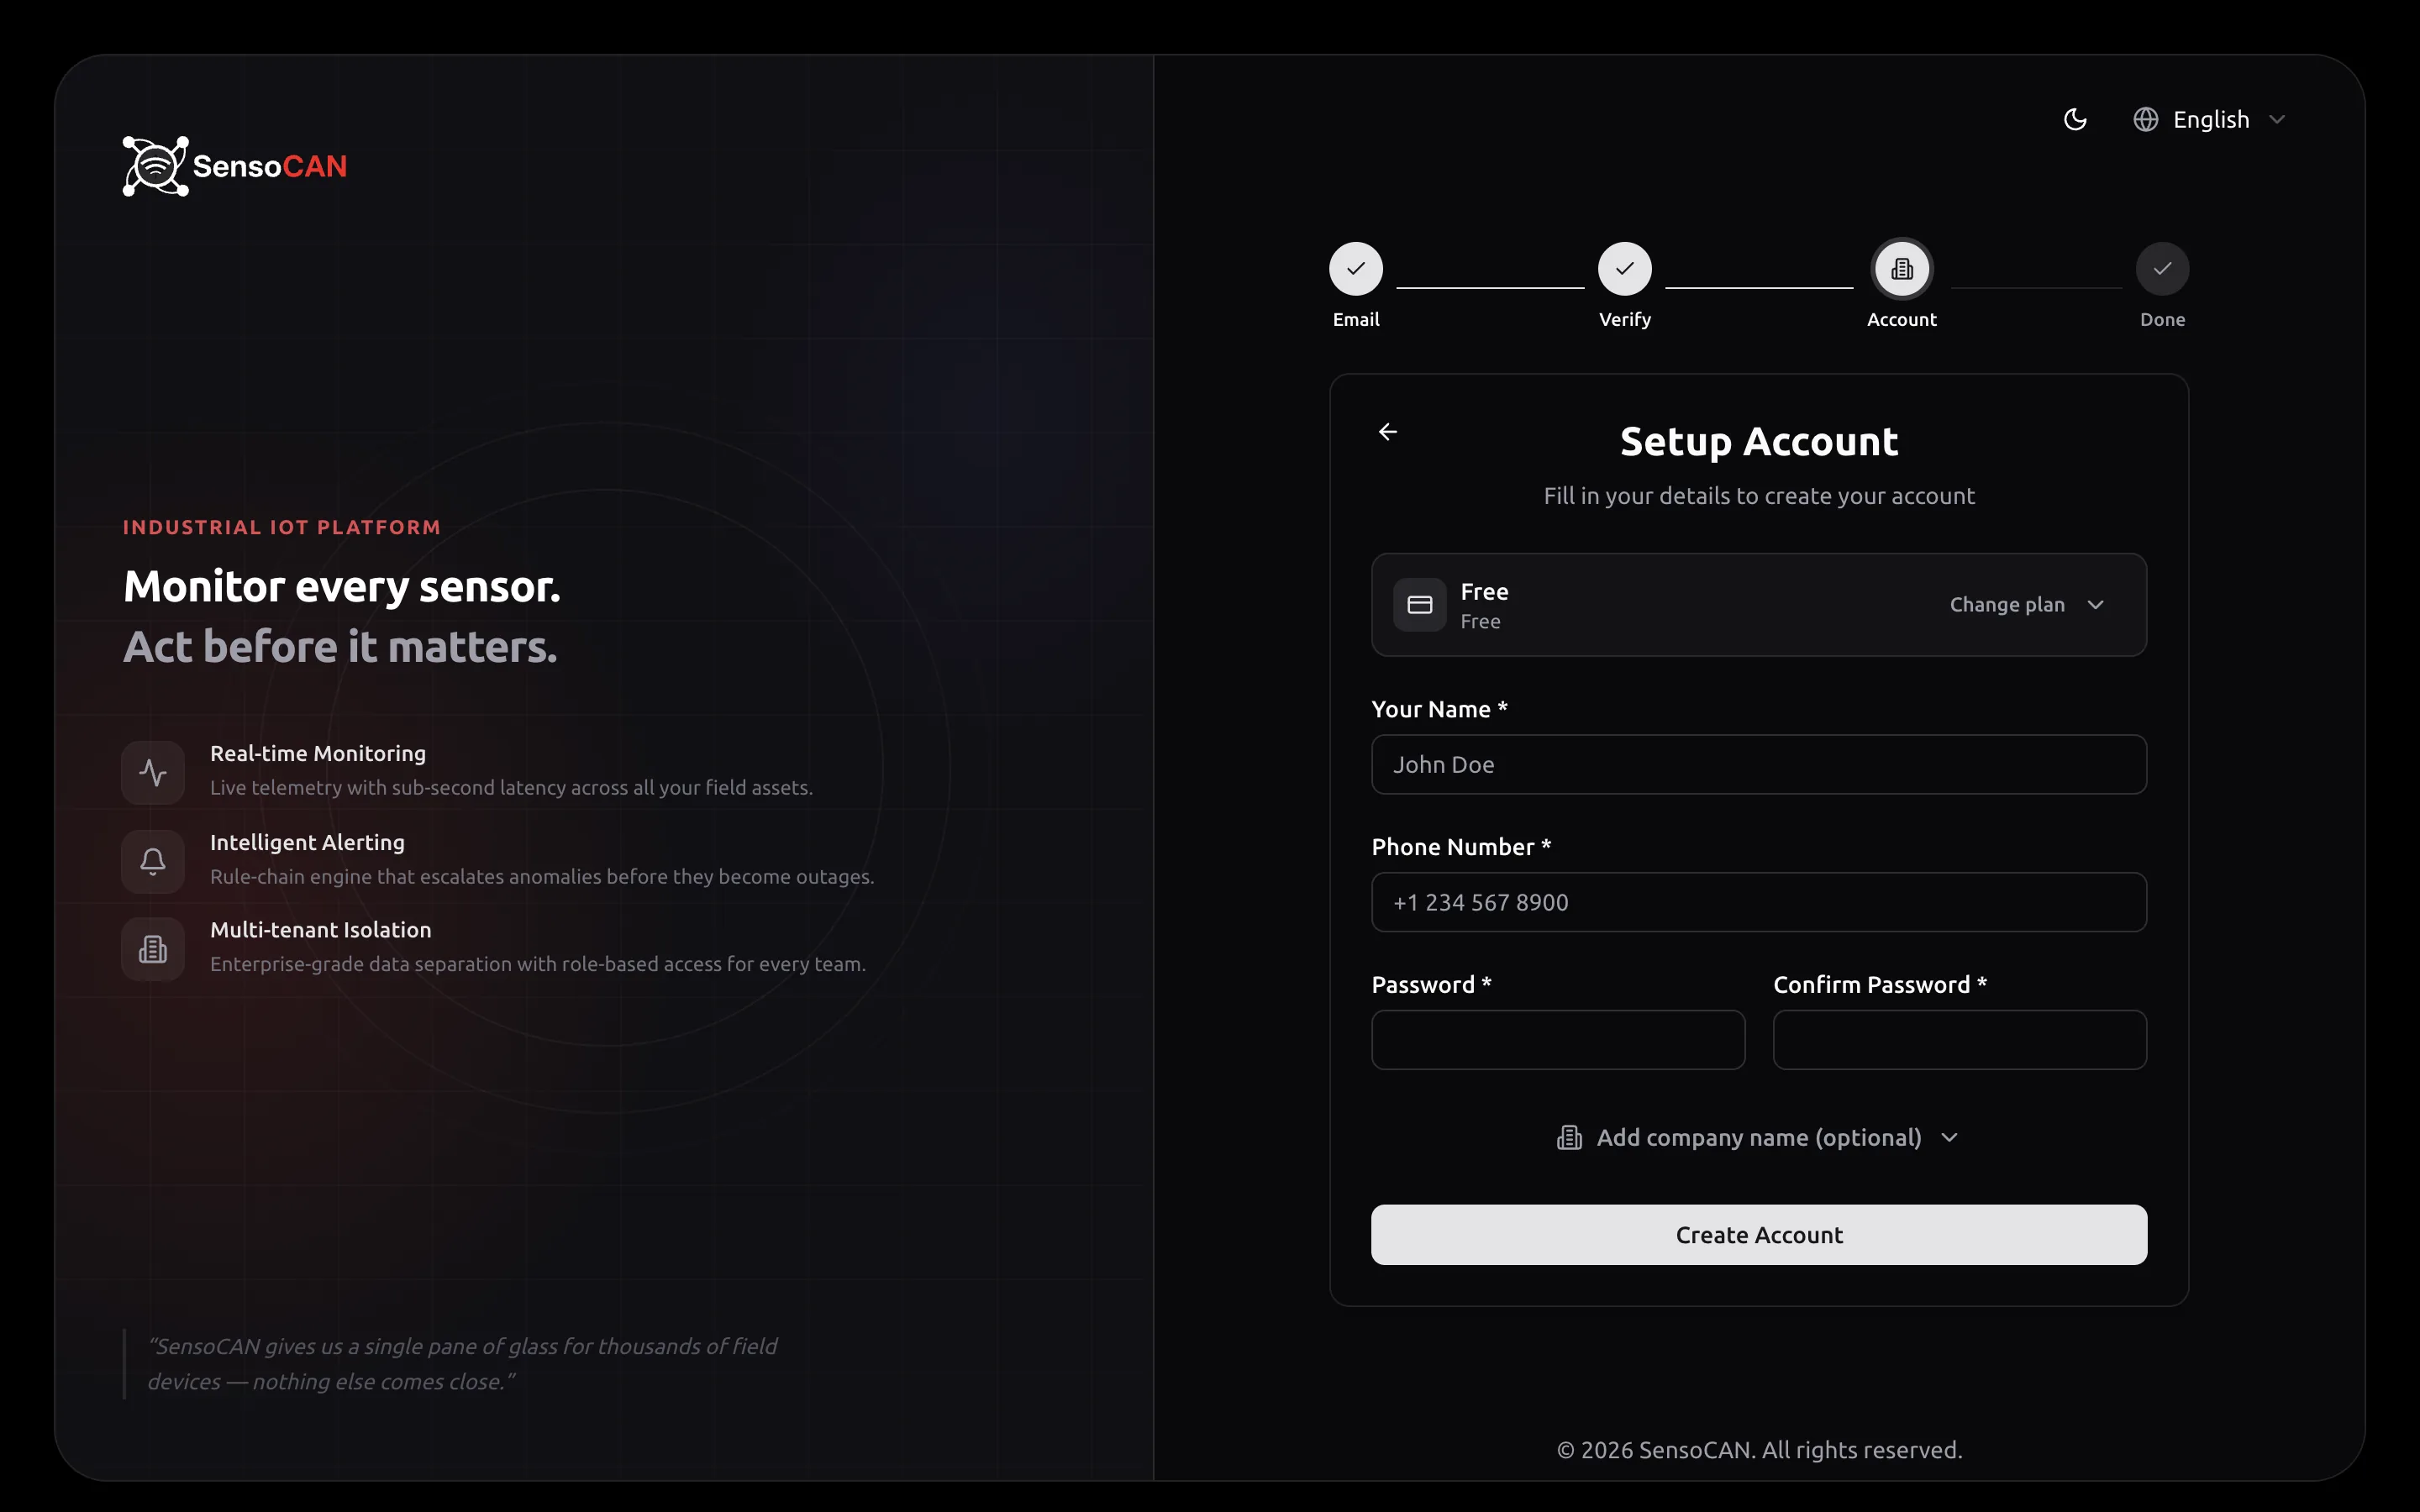
The back arrow here returns you to the Email step, not to the code — you would be sent a new one from there.
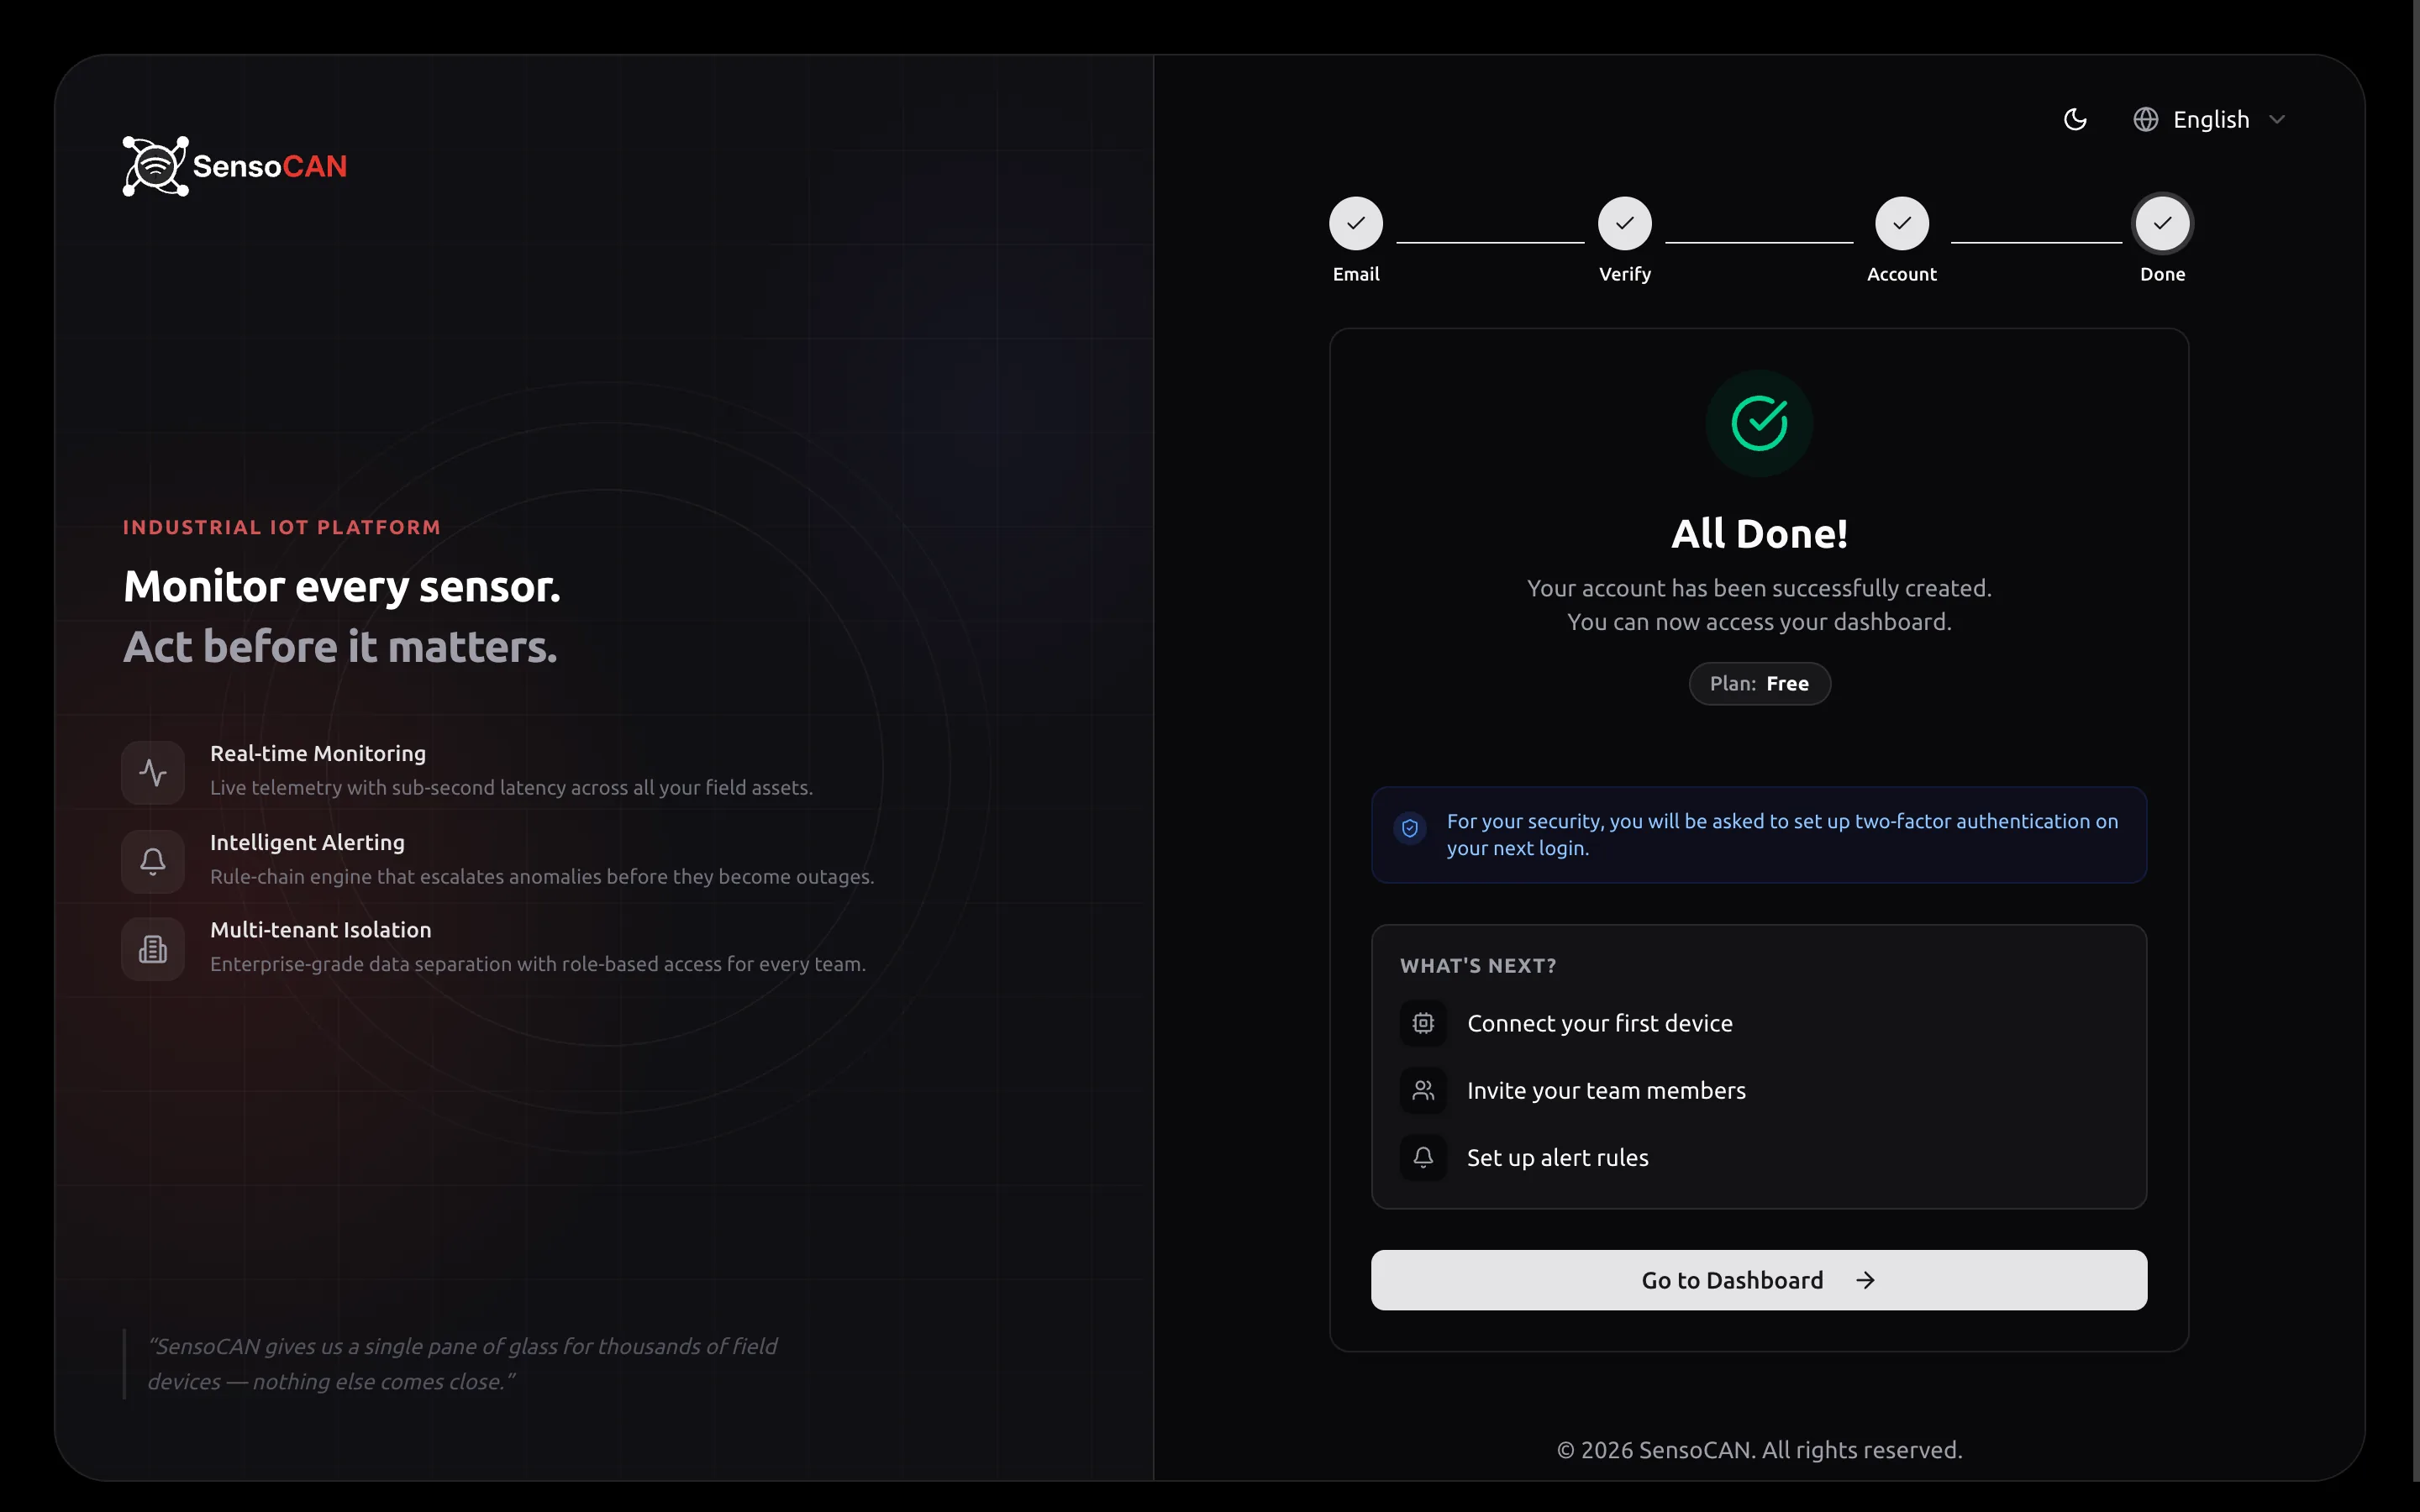
Step 4 — All Done!
Your organisation exists, your email counts as verified, you are its first Admin, and you are already signed in.
The card reads All Done! with a What's Next? list — Connect your first device, Invite your team members, Set up alert rules — and a notice that you will be asked to set up two-factor authentication on your next login. Go to Dashboard takes you in.
Your first login
Next time, you sign in at the login page, titled Log in — Welcome back! Please enter your details. Enter your Email Address and Password, tick Remember me to stay signed in, and use Forgot password? if you need a reset link.
The login form matches your address exactly, capital letters included. If sign-in fails with a password you are sure about, check the capitalisation first.
Setting up two-factor authentication
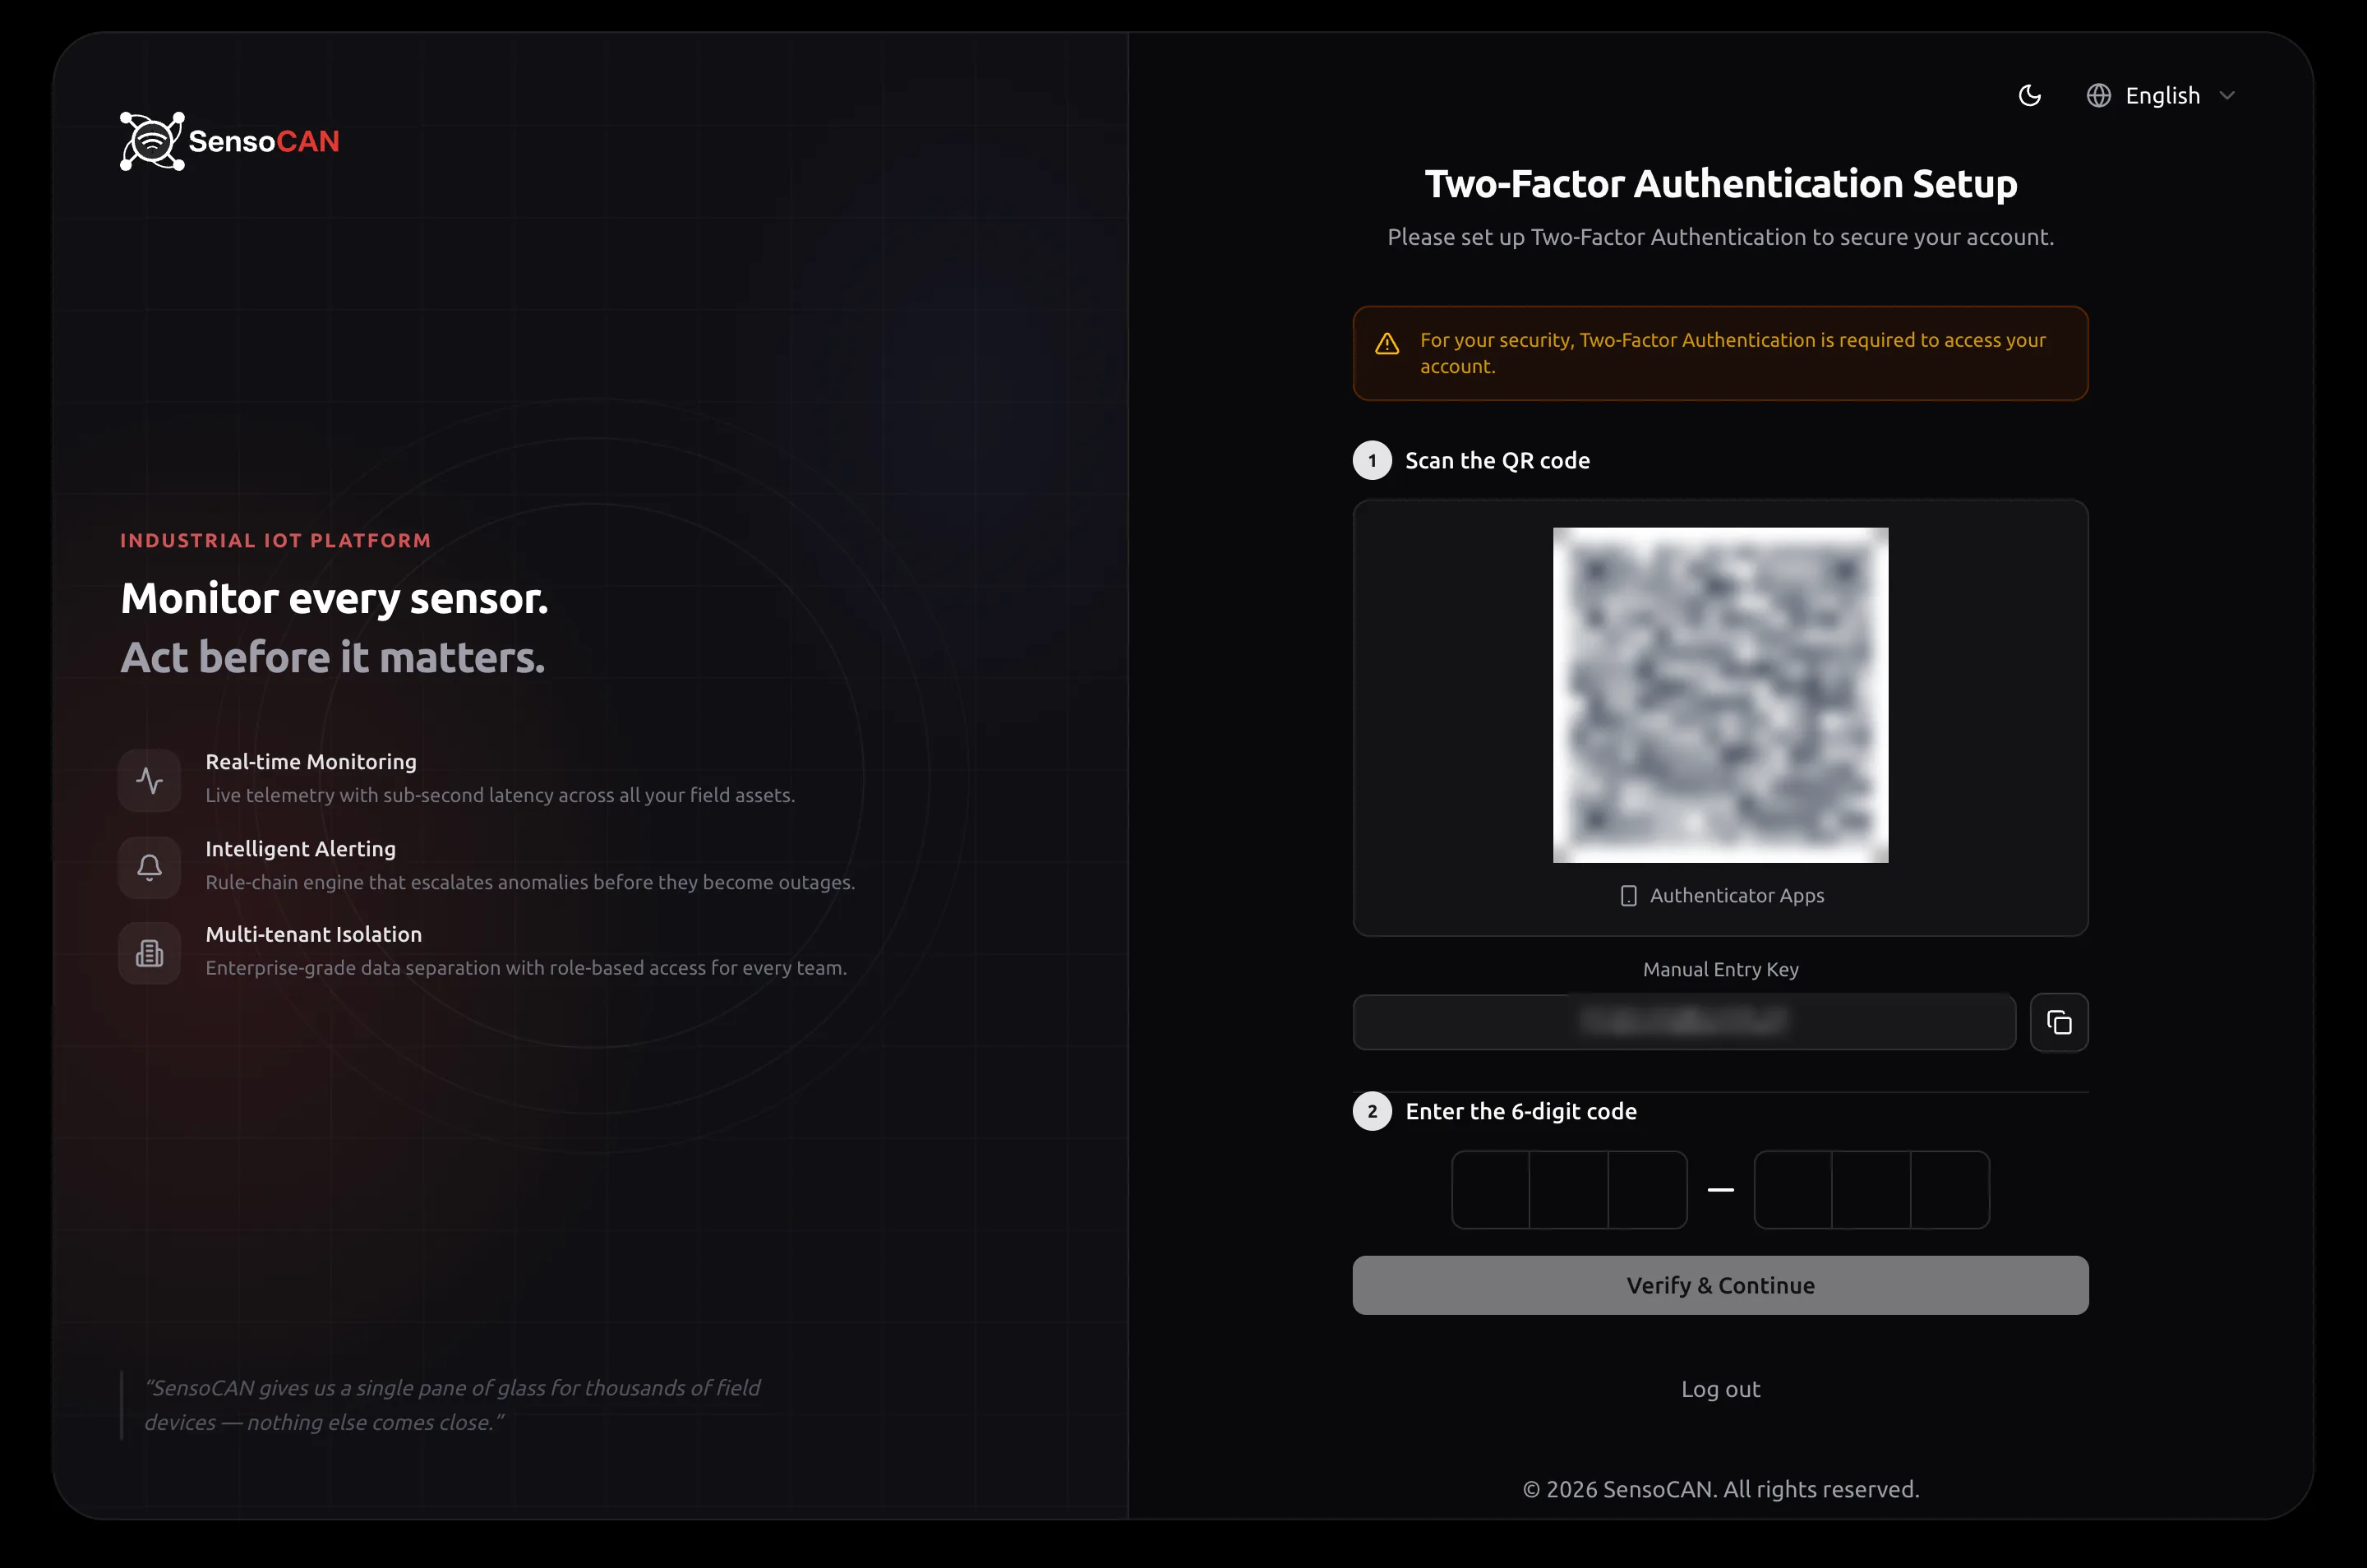
On that first login you are taken to Two-Factor Authentication Setup before anything else, under a notice reading "For your security, Two-Factor Authentication is required to access your account." Nothing else in SensoCAN opens until it is done; the only way off the page is Log out.
Confirm your password
The page opens on Confirm Your Password — Please confirm your password to continue setting up two-factor authentication. Type the password you chose at sign-up and press Confirm.
Register your authenticator app
1 — Scan the QR code. Point your authenticator app at the code. If the phone cannot scan it, copy the Manual Entry Key underneath and type it into the app by hand.
2 — Enter the 6-digit code. Type the six digits your app generates into the boxes and choose Verify & Continue.
Save your recovery codes
The page turns to 2FA Enabled — Two-Factor Authentication has been successfully enabled on your account — and lists your Recovery Codes with a warning to "Save these recovery codes in a secure password manager."
Copy All puts them on your clipboard. I have saved my recovery codes confirms you have stored them somewhere, and until you press it Continue to Dashboard stays greyed out.
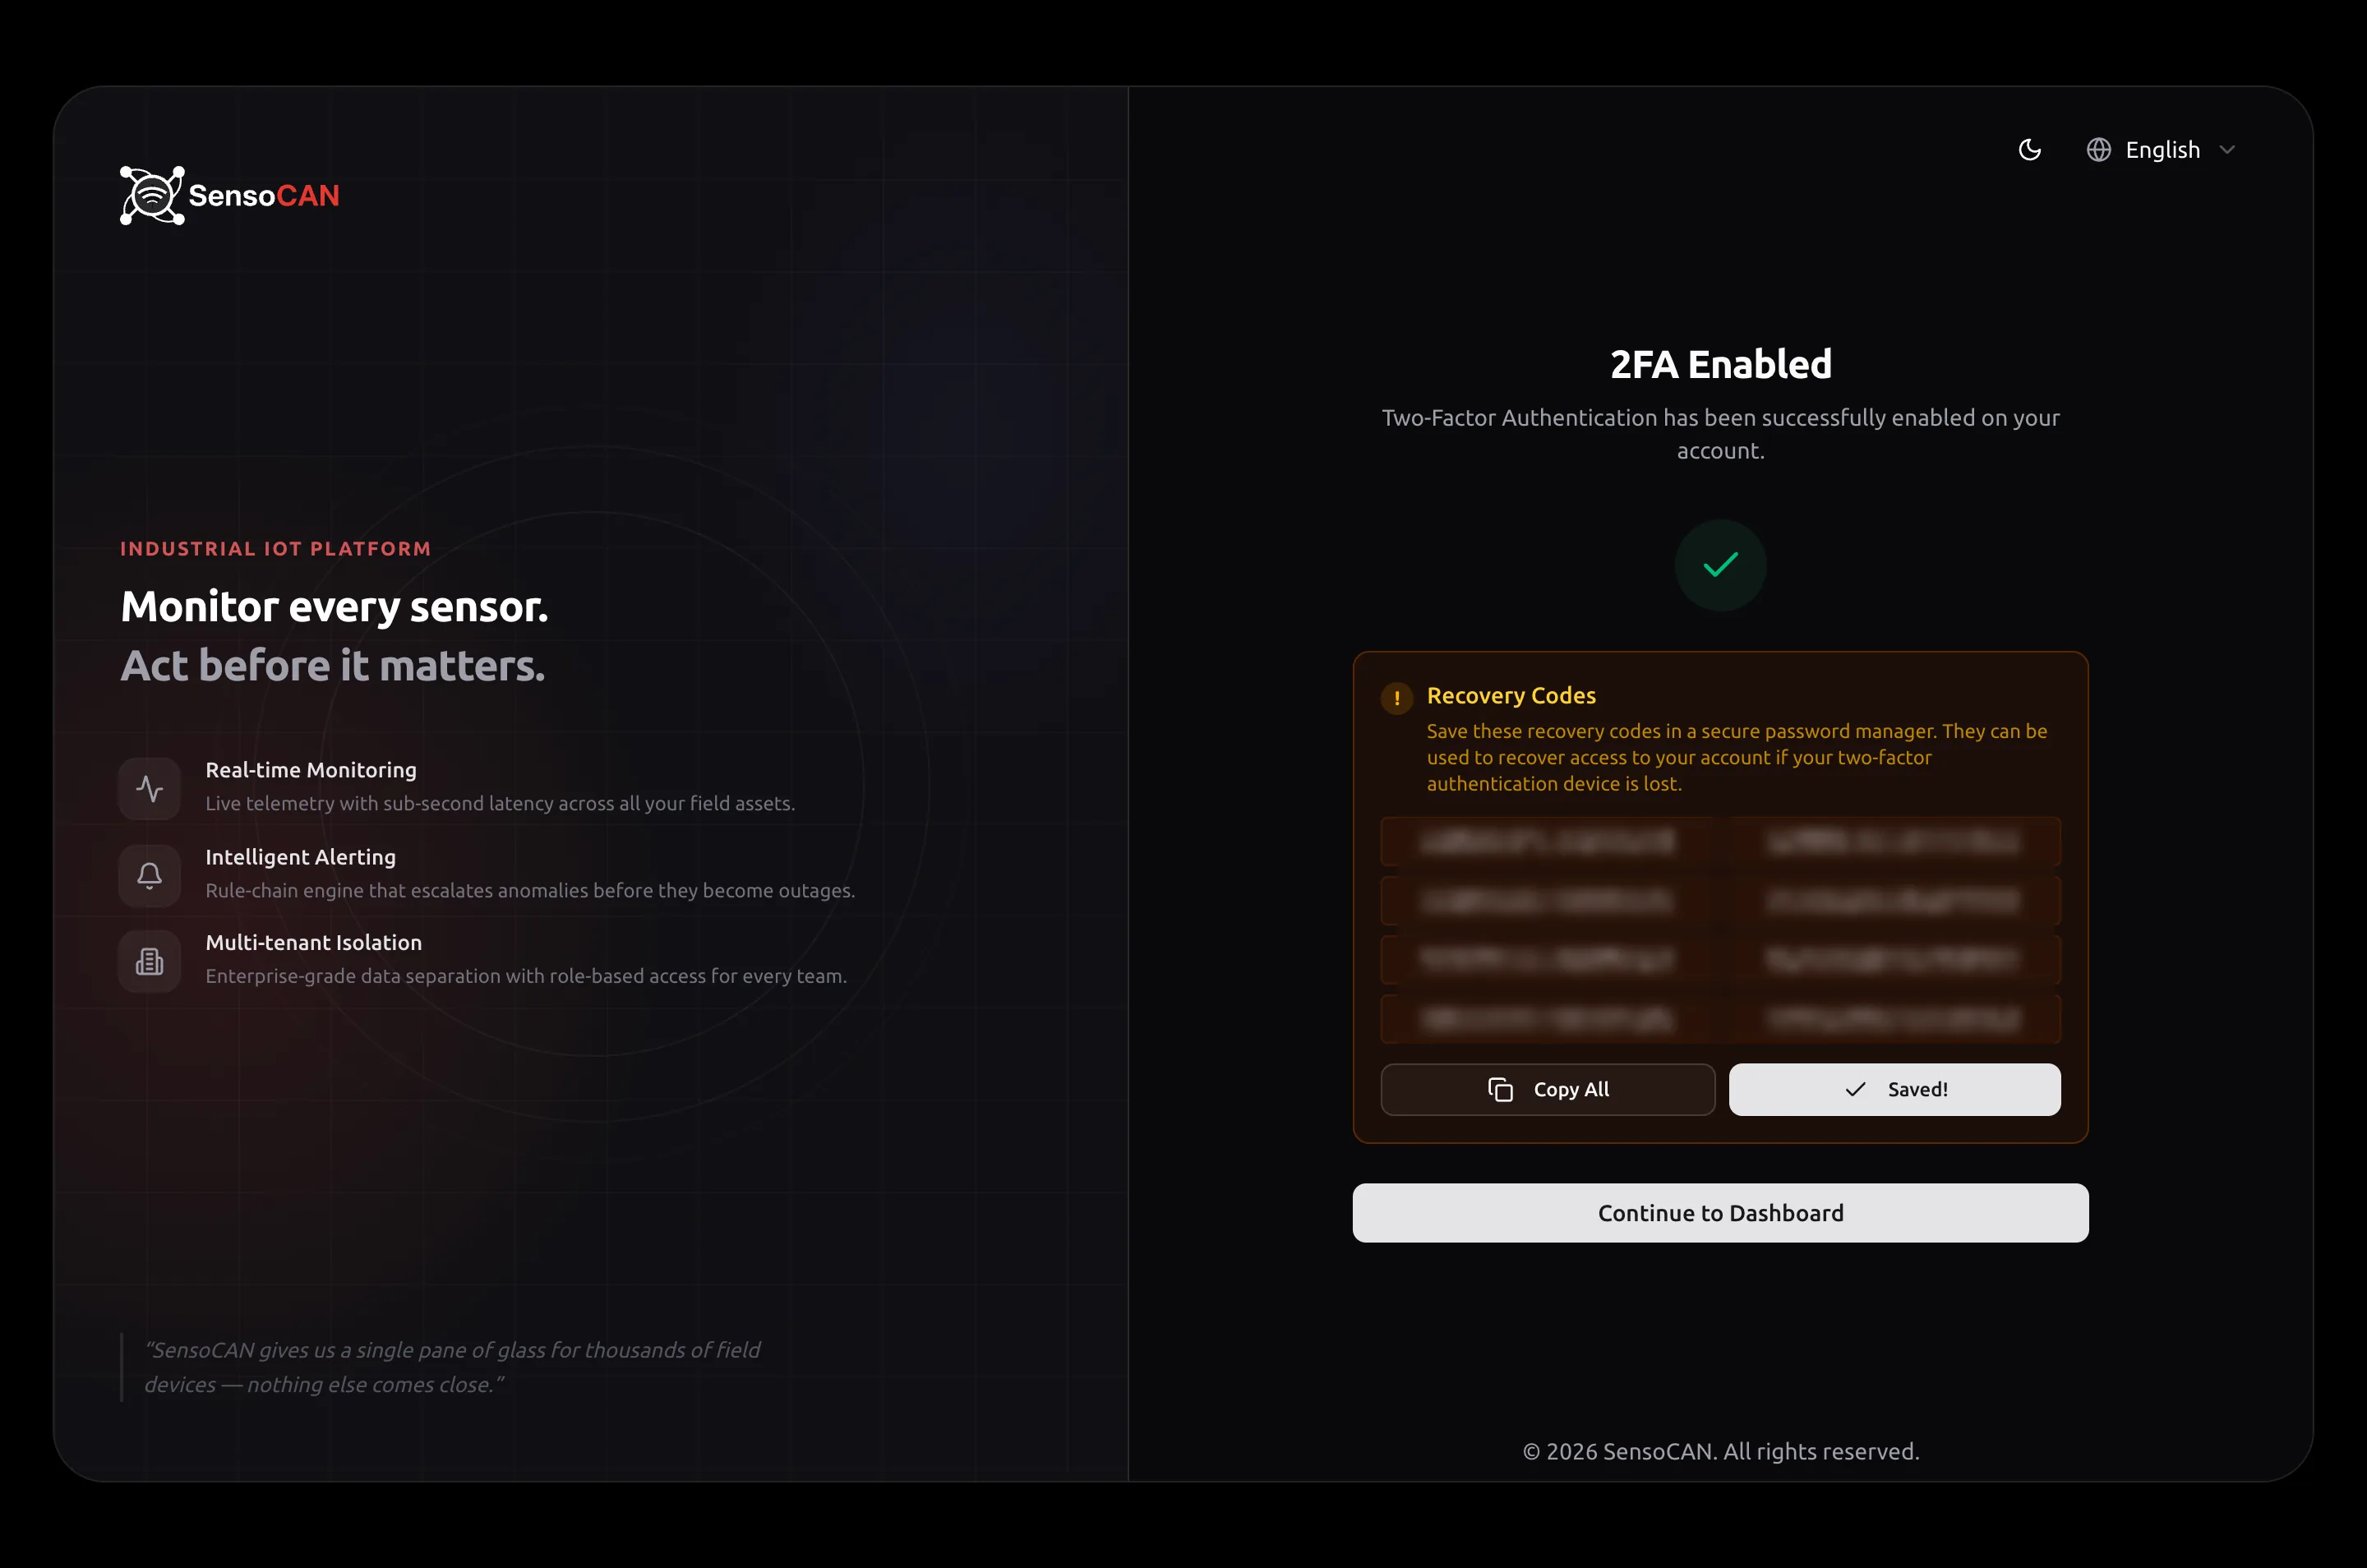
They are the way back in if the phone holding your authenticator is lost. A password manager or a printed copy in a safe place both work; a note on the same phone does not.
Next: connect your first device.