Invite your team
Adding someone takes two decisions: which role they get, and which devices they can see. The role sets what kind of work they may do; the assignment sets what they may do it to. A new Admin with no devices assigned sees an empty screen.
Add a colleague
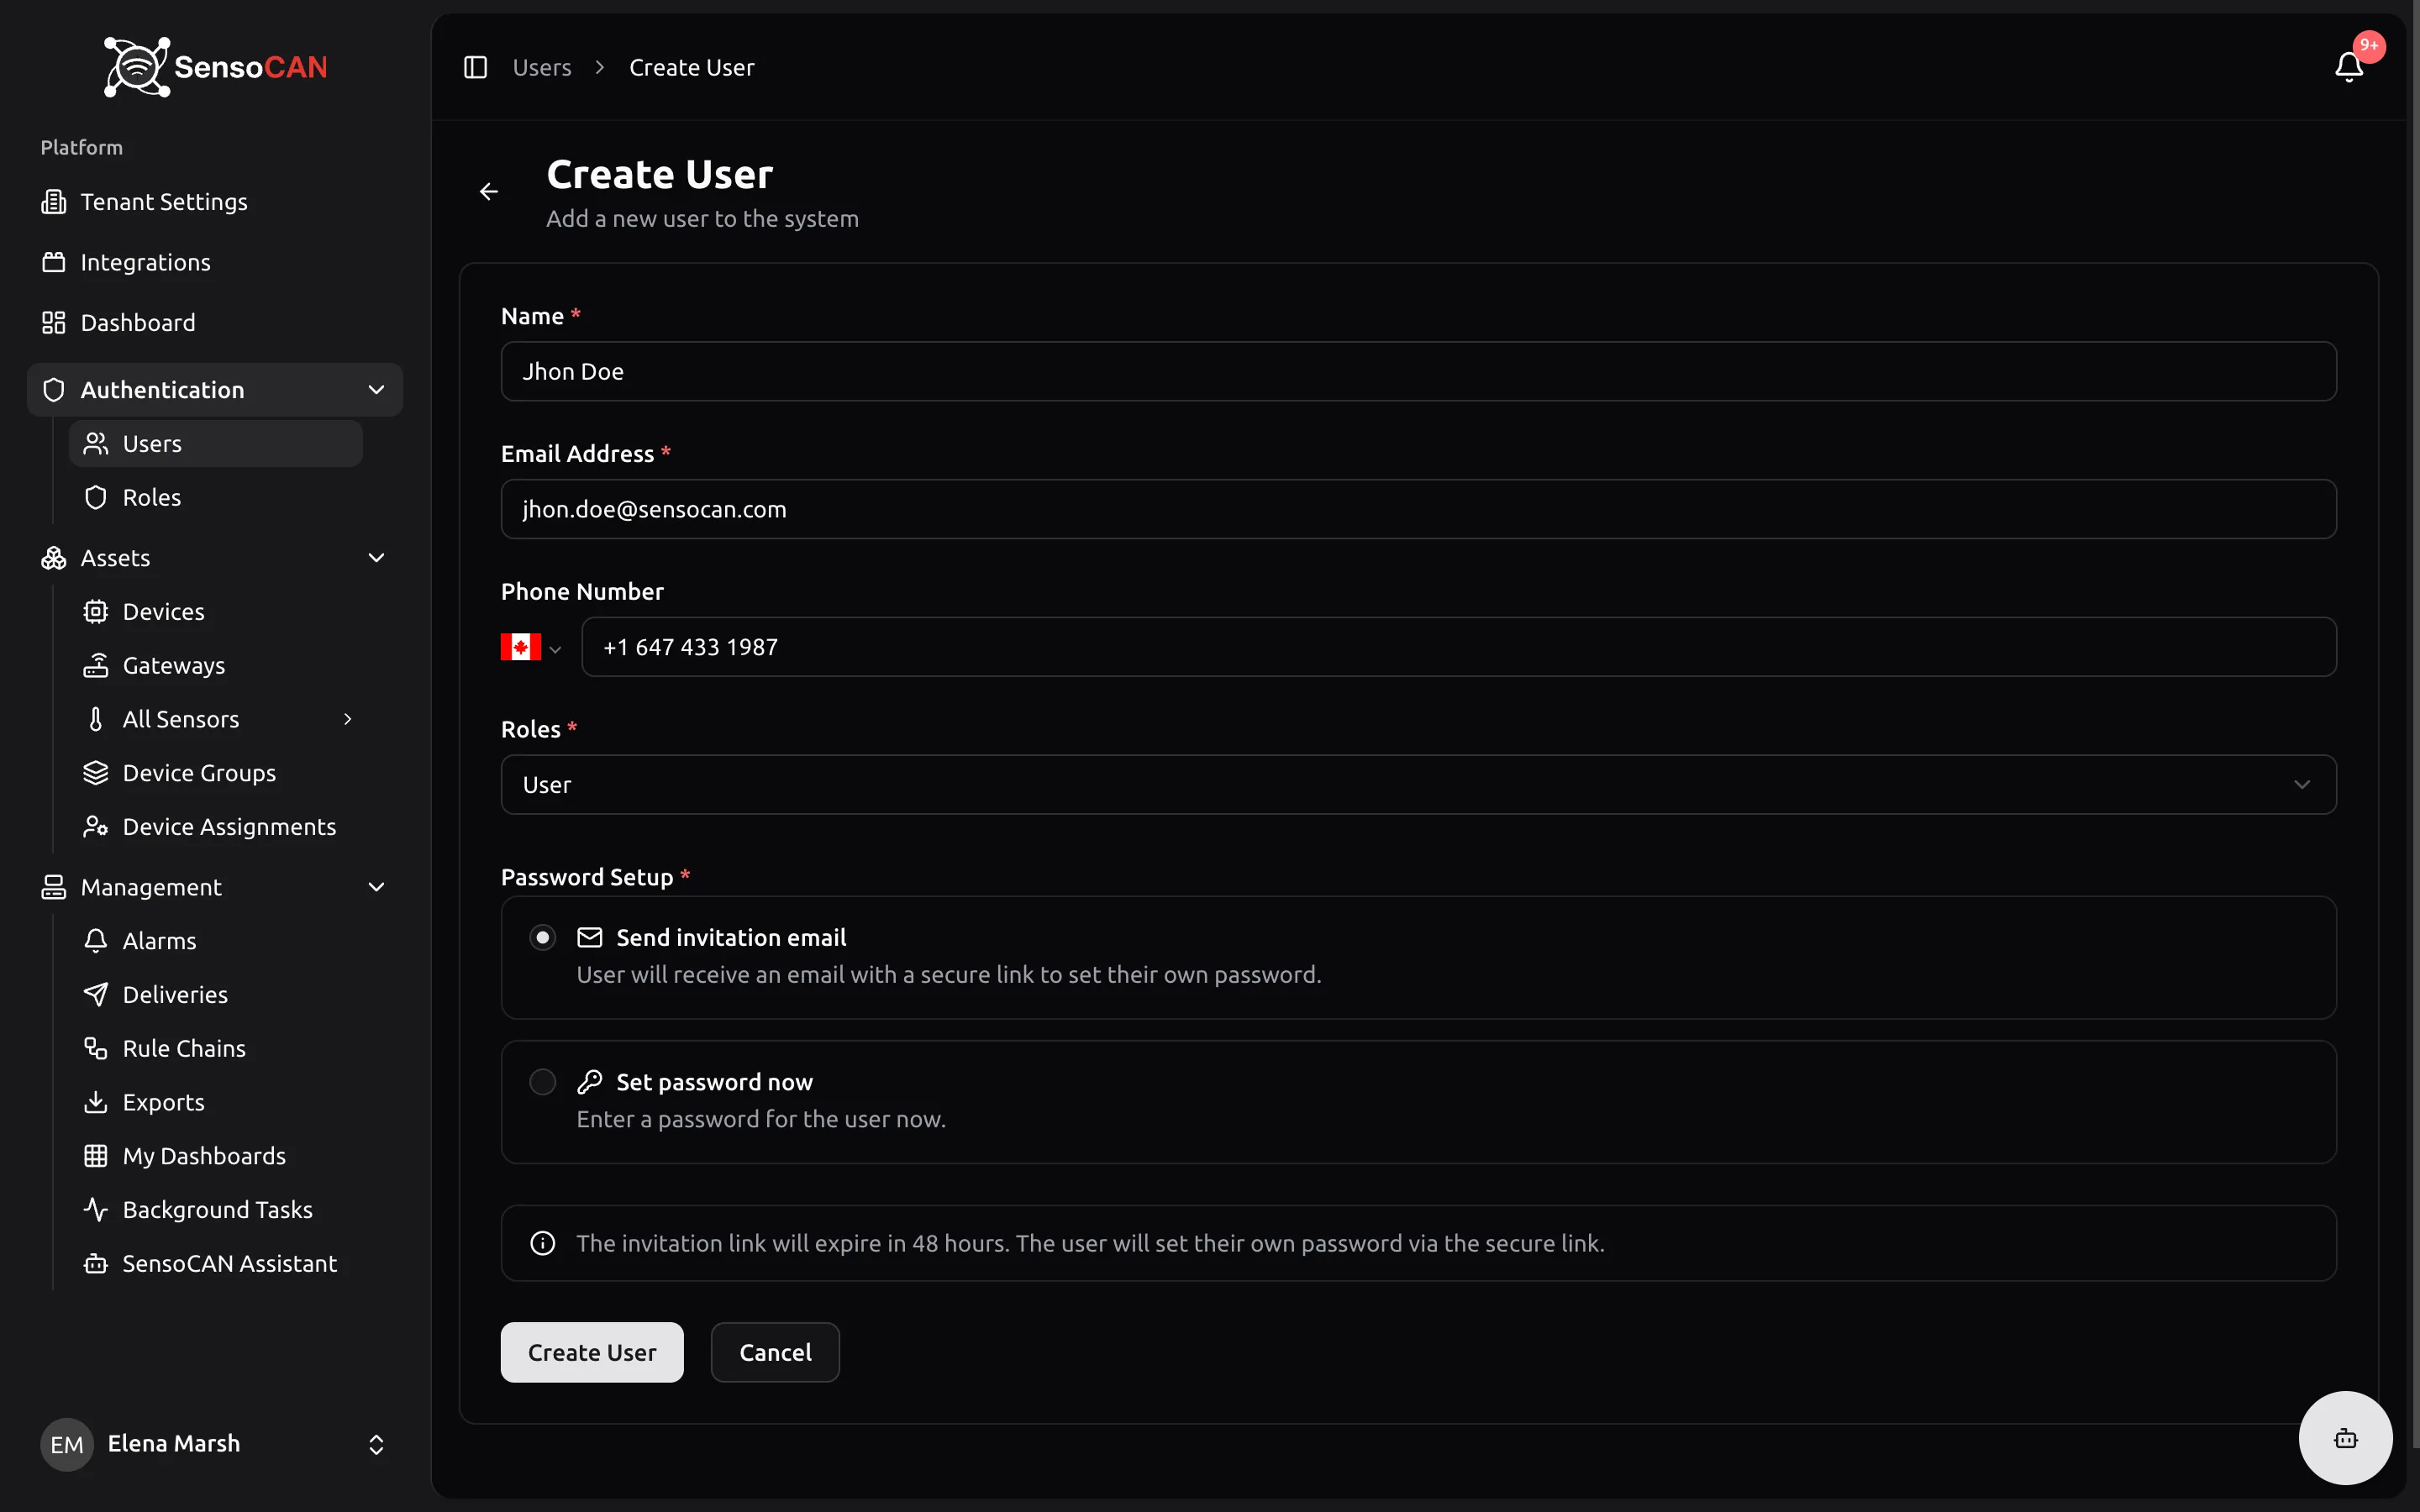
Go to Users → Add User, under Authentication in the sidebar. The page is titled Create User.
- Name and Email — required. The address must not already be in use.
- Phone Number — optional, with a country picker.
- Roles — required. One role per person; see the three built-in roles below.
Then choose how they get a password under Password Setup:
- Send invitation email (the default) — User will receive an email with a secure link to set their own password.
- Set password now — you type one for them. Pair it with the Require password change switch so they must replace it on first login.
Choose Create User.
What the invitation link does
Your colleague receives an email titled "You've Been Invited to SensoCAN" with a Set Your Password button. That link is valid for 48 hours.
Opening it shows the Set Your Password page with their name and email filled in and read-only, plus a password and confirmation — at least 8 characters. After Set Password & Continue they are sent to the sign-in page. They are not signed in automatically; logging in themselves is a good first test that it worked.
An expired or already-used link shows "This invitation link is invalid or has expired." on the login page.
Resending an invitation
If the 48 hours run out, or the email never arrived, open that person's row menu on the Users list and choose Resend Invitation. It only appears while someone is still waiting, so it doubles as the way to tell: the Status column shows only Active or Deleted, never "pending".
The link from the previous invitation stops working immediately — an old email in their inbox dies the moment you resend. You can resend up to three times per person per hour.
The three built-in roles
Every organisation ships with three roles. They cannot be edited, but you can clone one and adjust the clone. The full permission table is in Roles and permissions.
Admin holds everything: users and roles, devices and gateways, sensors and profiles, device groups and assignments, rule chains, alarms, deliveries, exports, dashboards, background tasks, organisation settings, integrations and the AI assistant. Give it to the people who run the platform.
Manager operates the system day to day: full control of devices, sensors, sensor profiles and device groups, alarms including acknowledging them, the deliveries log, exports and dashboards, plus a read-only view of the user list. A Manager does not reach roles, rule chains, the gateways page, bulk device assignments, sensor types, organisation settings, integrations, background tasks or the assistant.
User is the read-only seat: view devices, sensors, device groups and alarms — they can see alarms but not acknowledge them — request and download exports, and build their own dashboards.
Assign devices so they can see them
This is the step people forget. Everyone except the organisation owner sees only the devices assigned to them, whatever their role, and that assignment also governs which sensors, groups and alarms they see.
Two ways to do it:
- One device, several people. Open the device and choose Manage Assignments. Pick users, then a mode: Attach adds to what is there, Detach removes, Sync replaces the list with exactly what you selected.
- Many devices, many people. Go to Assets → Device Assignments for the bulk view: the same three modes, plus shortcuts to assign every device to the selected users or every user to the selected devices. Admins hold it by default.
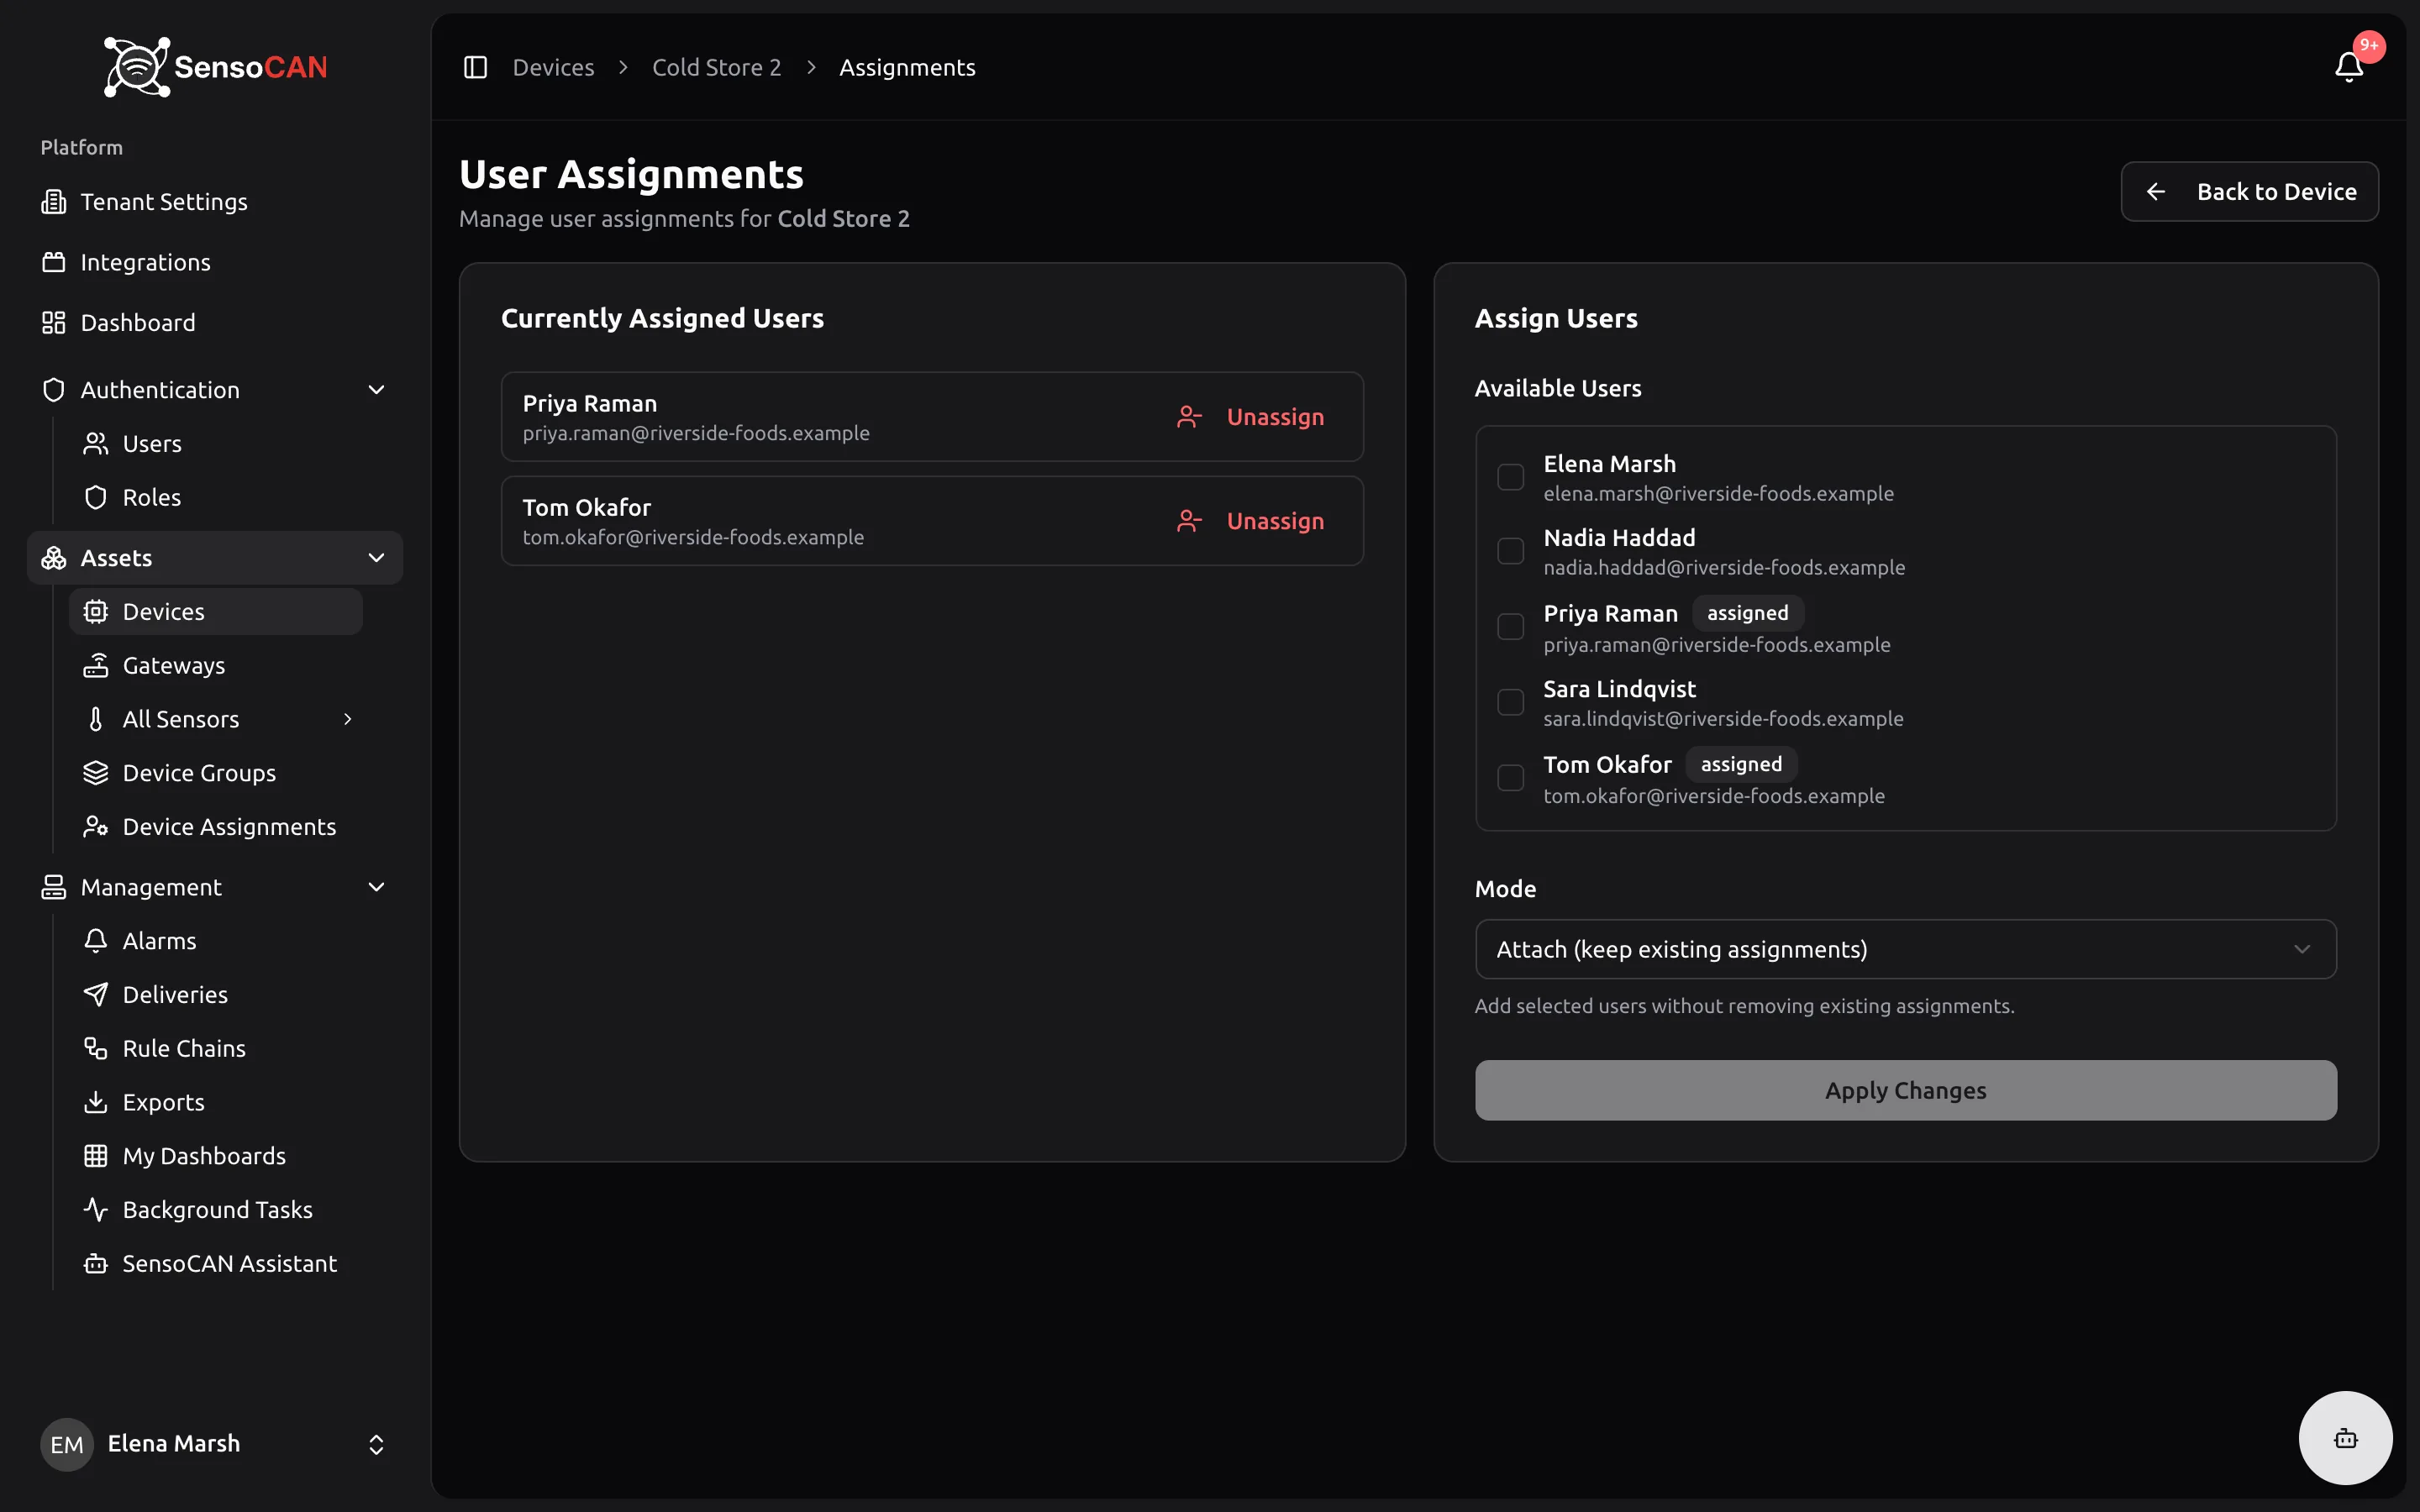
SensoCAN refuses to unassign you from a device, or to sync a list that leaves you out. Ask another Admin if that is really what you want.
With a device connected and a team invited, carry on to the user manual, or build your first automation in Rule chains.